

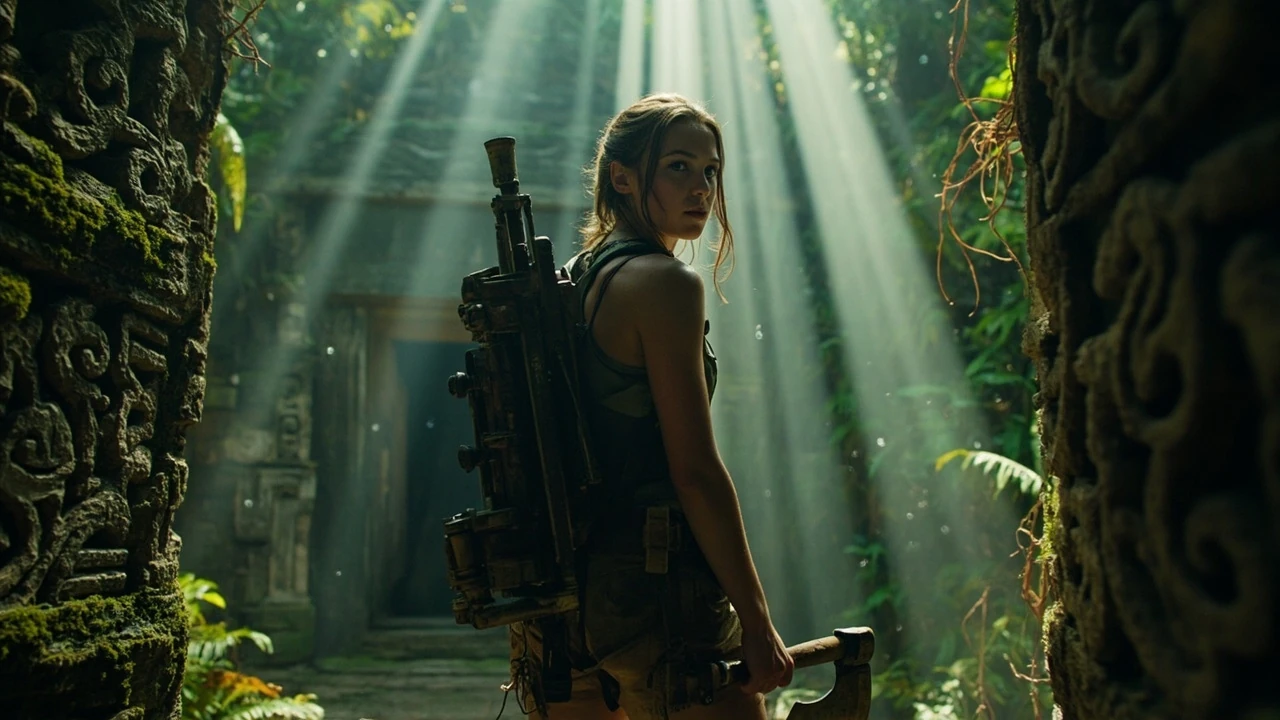

Shadow of the Tomb Raider walkthrough: how to use this guide
This Shadow of the Tomb Raider walkthrough is built for players who want a single reference for the entire campaign, from the opening storm in Cozumel through the final confrontation in the Hidden City of Paititi. The page is organized as a progressive path so you can read it linearly or jump to the region, puzzle, or boss you are stuck on. Each section lists the objectives the game actually tracks, the order in which story-critical tombs open, and the gear or skill you will need before you walk in.
The guide assumes you are playing the 2018 release on a current platform build, which is the most common configuration right now. Mechanics described here are based on the original Eidos-Montréal and Crystal Dynamics design, the published control scheme, and the platform patches that have shipped since launch. Where behavior is tied to a specific difficulty or mode, that is called out in the section header or the notes immediately under it.
Use the table of contents below to find the chapter you need. The puzzle sections are written so the solution sits below the description of the visible mechanism, which keeps the page useful whether you want to solve the puzzle yourself or skip directly to the answer. The boss section explains each encounter as a sequenced fight rather than a single health bar, because the difficulty in Shadow of the Tomb Raider comes from arena mechanics, not raw damage.
Throughout the guide, the focus is on durable mechanics. Camouflage, resource crafting, and exploration tools all behave the same way in every region, so learning the underlying system once will keep you oriented through the entire shadow of the tomb raider walkthrough. If a mechanic is referenced later and you have not seen it explained, it is covered in the systems section near the top of the page.
Story context, release window, and what carries over
Shadow of the Tomb Raider is the third entry in the rebooted series that began with Tomb Raider in 2013 and continued with Rise of the Tomb Raider in 2015. It follows Lara Croft and Jonah Maiava as they pursue the Order of Trinity through Mexico and Peru, and it leans harder into Mesoamerican mythology than either predecessor. The base game shipped in September 2018, followed by a season pass that added seven challenge tombs, a handful of side stories, and several weapon and outfit packs. The Definitive Edition, released in late 2019 for some platforms, bundles the base game with the post-launch content and is the version most current storefronts sell.
Save data does not carry forward from earlier entries. Skills, weapons, and outfits are reset at the start of every new campaign, even on the same platform account. The only progression that persists across playthroughs is New Game Plus, which unlocks after the credits and carries your final skill tree, your fully upgraded weapons, and most resources into a second run. There is no cross-title carryover from Rise of the Tomb Raider, and there is no online service that syncs progress between platforms.
For platform support, the current storefronts list Shadow of the Tomb Raider on PC, PlayStation 4, Xbox One, and the Google Stadia catalog that was retired in 2023. PC players in particular should expect a small handful of post-launch patches to already be applied, because the original launch build had several performance and crash issues that were resolved within the first six months. If you are playing on PC and the game refuses to launch or stutters heavily, the first step is to verify the build is up to date through your storefront rather than troubleshooting the game itself.
Systems and mechanics you should learn first
Before stepping into Cozumel, it helps to understand the three systems the game asks you to manage across the entire shadow of the tomb raider walkthrough: stealth and combat balance, resource crafting, and exploration tools. None of these are explained in a single tutorial, so picking them up early saves a lot of trial and error later.
Stealth, awareness, and visibility
Enemies have an awareness meter that fills as they detect you. The meter is divided into a yellow “suspicious” band and a red “engaged” band. Staying in the yellow band lets you break line of sight and reset the meter, while reaching the red band triggers combat and locks the encounter. Awareness is driven by line of sight, sound radius, mud, and a stealth kill from the right angle. Lara’s outfit affects only cosmetic detail and does not change detection curves, so a deliberate silhouette or a covered approach matters more than the gear she is wearing.
Resource crafting and the camp system
Resources fall into salvage, plants, and animal parts. Salvage is used at base camps to refit weapons and craft new ammunition, while plants and animal parts are consumed for healing and for specific survival crafting. Fast travel is unlocked by finding and resting at base camps, so opening a new camp is also a navigation unlock. Crafting happens in the inventory at any time, but upgrading a weapon requires sitting at a bench in a camp and paying the salvage cost.
Exploration tools: rope arrows, climbing axe, and the rebreather
The rope arrow lets you create ziplines and pull down environmental objects. The climbing axe opens red-painted walls and surfaces, which gate a large number of the optional challenge tombs. The rebreather is acquired in the second region and is required for any underwater segment longer than a few seconds. Each tool has a short tutorial when you first receive it, and the puzzle design leans on the combination of two or more of these tools rather than a single gimmick.
Skills and progression paths
Skill points are earned through completing tombs, story milestones, and side content. Three branches exist: Seeker, which leans into exploration and resource detection, Scavenger, which tunes crafting and stealth, and Warrior, which improves combat handling. There is no single best path, and the game lets you respec freely at base camps, so the practical advice is to invest in skills that match the immediate region rather than trying to plan an endgame build.
Chapter 1: Cozumel and the opening storm
The Cozumel chapter opens the Shadow of the Tomb Raider walkthrough with a short, tightly scripted sequence that establishes Lara’s diving ability, the rope arrow, and the basic detection system. The objectives are linear and there are no optional tombs in this region, which makes it a clean training ground for the rest of the game.
Main objectives in Cozumel
- Reach the dive site and surface inside the cenote.
- Follow the submerged path to the ceremonial chamber.
- Escape the flooding chamber through the upper exit.
- Reach the surface and survive the storm sequence.
The cenote swim is a tutorial for underwater exploration. You follow a torch-lit path through three chambers, each adding a small mechanical layer: navigating a tight gap, solving a current-based shortcut, and reading a carved mural that hints at the larger narrative. The flooding sequence is the only point in the chapter where the game forces a fail state, and it is generous, so treat it as a guided experience rather than a stress test.
Combat and stealth in Cozumel
The first hostile encounter introduces awareness, mud, and the ability to use rope arrows on environmental objects. Enemies patrol in a tight ring, which makes the standard loop straightforward: wait for one enemy to break from the group, perform a stealth takedown from a low wall or hanging vine, then reset the awareness meter of the second enemy. The mud patches are deliberately placed near the takedown routes, so do not skip them.
Reward and unlock after Cozumel
Completing the chapter unlocks the rope arrow as a permanent tool and grants your first batch of skill points. It also opens Kuwaq Yaku, the first hub village, which contains merchants, a base camp, and a fast travel point that becomes central to the entire shadow of the tomb raider walkthrough.
Chapter 2: Kuwaq Yaku and the Peruvian jungle
Kuwaq Yaku is the hub that links the opening region to the larger Peruvian jungle. The village itself is small, but it is the first place where side content, merchants, and optional tombs are accessible at the same time, and it is the first checkpoint that can be revisited freely after the story moves on.
What to do in Kuwaq Yaku before leaving
- Visit the merchant and buy the first weapon upgrade available to your current salvage budget.
- Rest at the base camp to unlock fast travel and a respawn anchor.
- Pick up the two side missions tied to village characters so the next story beat does not strand them.
- Stock at least ten healing nodes crafted from fiber and plant parts before the jungle sequence.
How to approach the Peruvian jungle
The jungle is the largest open space in the first half of the game. It is dense, vertical, and full of optional challenge tombs, side missions, and collectible resources. The intended loop is to leave Kuwaq Yaku, follow the main story marker into one of the smaller jungle regions, then return to the village to sell salvage, restock, and pick up the next batch of content. Trying to clear the entire jungle in a single pass is possible but inefficient, because the climbing axe opens areas that are not reachable earlier in the story.
Survival resources in the jungle
Plants, animal parts, and salvage spawn on fixed timers in the jungle, and the timing differs by resource type. Plant pickups respawn within a few minutes of the player leaving and returning to the area, while salvage deposits take longer. Hunting jaguar, deer, and small game is the most efficient way to stock up on the rarer animal parts, because predator meat converts into a strong healing item through a quick crafting recipe. Spending a few minutes hunting at the start of each jungle session is usually a better return on time than running straight to the next objective.
Challenge tombs: how they work and what they reward
Challenge tombs are the optional platforming puzzles scattered through every region. They are the single largest source of skill points in Shadow of the Tomb Raider, and they are also the most replayable piece of content, because each tomb is a self-contained mechanical lesson. Solving a challenge tomb always rewards a major skill point, a small resource bundle, and a narrative sketch that adds texture to the world.
Mechanics you will see across every challenge tomb
- Vertical platforming sequences that combine climbing axe surfaces and rope arrows.
- Light and shadow puzzles built around mirrors, sundials, and sunlit platforms.
- Pressure plate sequences that require splitting attention between multiple objects.
- Water routing puzzles that move platforms or open gates as the level changes.
There is no single difficulty curve. Some of the earliest tombs are easier mechanically but harder to find, while later tombs test precision platforming on narrow ledges. If a tomb is frustrating, the answer is almost always to look up and down rather than ahead, because the route back to the puzzle is usually gated by a vertical mechanism.
Recommended order for challenge tombs
The game does not require a fixed order, but the suggested progression is the tombs in Kuwaq Yaku first, then the tombs you encounter in the natural flow of the Peruvian jungle, then the tombs in the hidden city. This order matches the order in which you unlock the climbing axe and the rebreather, and it makes the harder tombs feel like a natural extension of the easier ones.
| Region | Recommended tomb order | Tools required | Skill reward focus |
|---|---|---|---|
| Kuwaq Yaku | Judge’s gaze, then the crypt near the merchant | Rope arrow | Seeker or Scavenger branch |
| Peruvian jungle | Tomb south of the rebel camp, then the two river-adjacent tombs | Rope arrow, climbing axe | Stealth or resource skills |
| Hidden City of Paititi | Tomb of the descendant, tomb of the challenger, tomb of the underworld | Climbing axe, rebreather, rope arrow | Combat and exploration final upgrades |
Chapter 3 to Chapter 5: the path through Peru
The middle third of the Shadow of the Tomb Raider walkthrough covers the path from the Peruvian jungle through the rebel base and into the mountains that lead toward the hidden city. The story is continuous, so the chapter breaks here are regional rather than narrative.
Peruvian jungle combat encounters
Combat in the jungle introduces Trinity patrols and the first wide arena fights. The most reliable approach is to start in stealth, thin the patrol with two or three takedowns, then use mud and vines to break line of sight before engaging the last group. Rope arrows are useful for pulling snipers off elevated positions, and the climbing axe can be used to open shortcuts that change the patrol loop in your favor.
Rebel base and the first boss
The rebel base introduces a friendly faction that fights alongside you for several encounters. The first boss is a melee-focused fighter in a confined arena. The encounter has three phases, and the failure mode is over-committing to attacks, because the boss has a long parry window. The right loop is to dodge laterally, punish the two or three hit recovery window, and back off when the boss glows red. Healing nodes should be saved for the second phase, when the arena shrinks.
Crossing the mountain pass
The mountain pass is a vertical climbing sequence that ends in a wide valley. It is the first time the game asks you to chain the climbing axe and rope arrow across a long route, and it is the most common place for players to get stuck. The intended path is to read the painted rock markings, follow them in order, and backtrack to the last marker if a climb fails. There is no penalty for falling apart from the time cost of restarting the section.
Chapter 6: The Hidden City of Paititi
Paititi is the second major hub, larger than Kuwaq Yaku and more integrated with the main story. It is the location of the bulk of the side content, the densest cluster of challenge tombs, and the merchant with the widest selection of upgrades. Most of the remaining shadow of the tomb raider walkthrough happens in or around Paititi.
What to do first in Paititi
- Unlock the fast travel point at the entrance as soon as you arrive, because the city is large enough that backtracking on foot is slow.
- Spend accumulated salvage on weapon upgrades at the merchant near the central square.
- Pick up all side missions, because several of them gate the last two challenge tombs in the region.
- Visit the base camp on the upper level to reset your skill points if the build is not yet where you want it.
Paititi combat and stealth
Paititi adds verticality to the standard combat loop. Many of the fights happen across multiple levels, with snipers on rooftops and melee units on the streets. The right approach is to take out the snipers first using rope arrows or stealth climbs, then drop into the street fight with the resources to handle the remaining group. Mud and water are still your best tools for breaking line of sight, and the city has more of both than the jungle.
Paititi exploration loop
Once the central story markers are cleared, Paititi is best handled as a sequence of short trips rather than one long exploration. Pick a side mission, follow the marker, clear the local challenge tomb if it is on the route, and fast travel back to the city center to resupply. The fast travel network is dense enough by this point that backtracking is rare, and the merchant in the upper district refreshes inventory after every main story beat, which means you can plan a long trip without worrying about running out of healing nodes.
Chapter 7: Cenote and the final tombs
The cenote sequence is the last major exploration section before the climax. It is fully underwater in several sections, which makes the rebreather the single most important tool in this part of the guide. There is also a large optional tomb here that gives the most skill points of any tomb in the game.
Underwater navigation in the cenote
The cenote requires you to manage oxygen, manage light, and read murals at the same time. The intended loop is to surface at each air pocket, scan the room for the next light source, and follow it to the next pocket. Trying to hold your breath across two rooms at once will run the air meter dry, and the cenote has limited oxygen refills outside the natural pockets.
Final challenge tomb
The final challenge tomb is a test of every tool you have unlocked. It is also a soft skill check, because the puzzles require precise platforming and fast camera movement. The recommended order is to clear the upper platforms first, then drop to the lower level, and finish with the central mechanism. This avoids the most common failure mode, which is to engage the central mechanism too early and trap yourself in a reset loop.
Boss strategy: how the final encounters work
The boss fights in Shadow of the Tomb Raider follow a clear pattern: each one is a sequenced set of arena changes rather than a single damage race. Reading the arena change is the skill the fights actually test. The shadow of the tomb raider walkthrough covers each encounter as a sequence so you can plan healing and skill use around the transitions.
| Boss | Location | Arena mechanics | Recommended approach |
|---|---|---|---|
| Rebel commander | Rebel base | Melee combo, short parry window, narrow arena | Dodge laterally, punish recovery, save healing for phase 2 |
| Trinity officer | Mountain pass | Ranged pressure, elevation, environmental hazards | Pull snipers with rope arrows, then collapse to melee |
| Undead guardian | Cenote | Area denial, summons, phase-based transformation | Burn summons first, keep distance in phase 3, use mud to reset aggro |
| Final boss | Hidden City | Multi-stage transformation, dynamic arena, scripted QTE bridges | Match the rhythm of each phase, do not panic heal, watch for the scripted environmental changes |
Universal boss tips
- Do not commit to long attack chains. The bosses all have a counter that punishes extended aggression.
- Use the climbing axe and rope arrows to reposition rather than to deal damage. The damage numbers are not the point.
- Healing during a scripted phase change is almost always safe, and the game telegraphs the change several seconds in advance.
- If you are consistently failing on a higher difficulty, drop to a lower one for the final boss, because the rewards do not change.
Gear, outfits, and loadout decisions
Outfits in Shadow of the Tomb Raider are cosmetic, but weapons and weapon upgrades are not. The weapon system is the one part of the loadout that has a permanent effect on damage and ammo efficiency, and it is worth investing in early. The shadow of the tomb raider walkthrough recommends focusing on two weapons for the majority of the game: the bow, which is silent and ammo-efficient, and a single-shot secondary, which is the right tool for armored enemies.
Weapon upgrade priorities
- Recurve bow: focus on accuracy and draw speed upgrades first, because both affect every encounter.
- Shotgun or pistol: focus on the upgrade that adds stagger, because the stagger is what makes the weapon useful against armored enemies.
- Trident or climbing axe combat upgrades: these are optional and only matter on the harder difficulty tiers.
Resource priorities for crafting
Carry capacity is the most common reason players run out of healing mid-fight. The fix is to upgrade the satchel as early as possible, and to keep a small reserve of plant-based healing nodes that are cheap to craft. Animal parts are rarer and should be reserved for the more advanced healing items that you use during boss fights.
Outfit selection in practice
Outfits are unlocked through exploration, side missions, and the in-game store, and they can be swapped at any base camp. The most useful practical feature of the outfit system is the camouflage rating, which is purely visual but does affect the silhouette Lara casts in shadow-heavy environments. Outfits with darker palettes blend more naturally into jungle and cave interiors, while brighter outfits stand out against the same backgrounds. The game does not track this as a stat, so the only consequence is that the player will see Lara more clearly during cutscenes and screenshots.
Side missions and optional content worth completing
Side missions in Shadow of the Tomb Raider are not filler. Several of them gate challenge tombs, merchant upgrades, or narrative payoffs. The shadow of the tomb raider walkthrough recommends completing all side missions in each region before moving to the next, because the backtracking cost later in the game is significant.
High-value side missions
- Kuwaq Yaku: the merchant’s daughter and the two missions tied to village characters.
- Peruvian jungle: the three side missions that open the additional challenge tombs in the region.
- Paititi: the missions that unlock the final two tombs and the merchant’s rare stock.
Optional content with limited value
There are a few side activities that look like content but offer very little return. The survival cache hunts in the jungle reward a small salvage bundle and a single skill point, and they are time-consuming to track down without an external map. The in-game archology documents add background lore that is interesting once but rarely changes the moment-to-moment gameplay. If you are short on time, the survival caches and most of the documents are the safest pieces of content to skip, while the side missions and challenge tombs should still be cleared.
Post-game and New Game Plus
After the credits roll, the game drops you back into the open world with all of your skills, weapons, and resources intact. The story remains at its final state, so the only meaningful post-game content is the side content you may have missed, the collectibles tied to achievements, and the harder difficulty tiers. The save file is converted into a New Game Plus slot that you can launch at any time from the main menu.
New Game Plus resets the story, the level layouts, and the puzzle solutions, but it carries over the full skill tree, all weapon upgrades, and most resources. Outfits and cosmetic unlocks also carry over. The mode is the right tool for a second playthrough on a higher difficulty, because the combat and traversal systems are easier to learn when the skill tree is already in place. It is also the intended way to chase the few collectible achievements that are tied to specific story segments, because the relevant content is locked behind story progress in the base save.
Common mistakes and how to avoid them
A small number of recurring mistakes show up in player discussions and in the way the game tunes its later encounters. None of them are hidden, and all of them are easy to fix once the pattern is visible.
- Rushing the story and arriving at a wide combat encounter without enough healing nodes. The fix is to clear the side content in the previous region before moving the story forward.
- Hoarding salvage in the early game. Salvage is not rare, and the merchant prices are stable, so selling excess salvage to fund weapon upgrades is almost always the right call.
- Skipping mud patches in combat arenas. Mud is the most reliable tool for resetting the awareness meter, and it is positioned in nearly every arena for a reason.
- Spending skill points without a plan. The respec is free, but cycling through random builds every chapter makes it hard to learn which skills actually change combat behavior.
Performance and platform notes
On PC, the game runs well on a mid-range CPU and a GPU from the last several generations. The most common performance issues are shader compilation hitches on the first run and occasional stuttering when fast traveling between regions. Both are resolved by a clean restart of the client. On consoles, the original release targeted 30 frames per second, and the Definitive Edition raised that target on the newer hardware families. The visual difference between the two builds is small in the jungle and noticeable in the cenote, where lighting is the dominant cost.
Accessibility options include remappable controls, a high-contrast mode for the HUD, and a reduced motion setting for the camera during scripted sequences. None of these affect the difficulty, and they are all on by default on the standard difficulty setting. If you have specific input needs, the control remap menu in the system settings is the most useful of the lot, because the default bindings assume a standard controller layout.
Frequently asked questions
How long is the Shadow of the Tomb Raider campaign?
The main story runs roughly 12 to 15 hours on a standard difficulty with light exploration. Adding challenge tombs, side missions, and collectibles typically doubles that figure, and full completion runs closer to 35 to 40 hours depending on the platform and the player’s familiarity with the genre.
Are there missable challenge tombs?
Yes. Several challenge tombs are only accessible during a specific story segment, and a small number of them are gated by a side mission that becomes unavailable after a certain point. The safest approach is to clear the tombs in each region before moving the story forward, which is the order this shadow of the tomb raider walkthrough recommends.
What difficulty should I play on?
Standard difficulty is the right setting for a first playthrough, because the boss patterns and arena mechanics are already challenging on their own. The harder difficulties remove HUD cues, raise enemy aggression, and remove the ability to quick save outside base camps, which turns the experience into a different game.
Can I respec skill points?
Yes. Every base camp has a skill reset option that refunds all spent points at no cost. There is no reason to plan an endgame build before the end of the game, and you are encouraged to experiment with different branches in each region.
Do outfits affect gameplay?
Outfits are cosmetic. They do not change detection, damage taken, or resource yields. The decision is purely visual, and the game does not gate any content behind specific outfits.
Is there a New Game Plus mode?
Yes. After completing the main story you can start a new playthrough that carries over most of your skills, weapons, and resources. The mode is useful for completing the last few challenge tombs and collectibles you may have missed, and it lets you play the harder difficulty tiers with the build you already enjoy.
What is the best way to manage resources in the late game?
Upgrade the satchel first, keep a small reserve of plant-based healing, and sell salvage rather than hoarding it. The merchant inventory refreshes after every story milestone, and the prices are stable enough that holding resources is rarely worth it.
Are there any puzzles that require external guides?
No. Every puzzle in the main story and every challenge tomb can be solved with the in-game visual cues. The most common reason players get stuck is that they have not noticed a small environmental detail, not that the puzzle is impossible. Reading the surrounding murals and listening to the in-game audio cues is usually enough to make progress.
Should I explore or push the story forward?
Explore. The game is balanced around the assumption that the player does at least the side content in each region before moving on, and several of the late-game encounters are tuned to the salvage and skills you would have accumulated by doing so. The single biggest mistake players make in a Shadow of the Tomb Raider walkthrough is rushing the story and then getting stuck on the first large combat encounter.
Does the Definitive Edition change the balance of the game?
The Definitive Edition adds the season pass content and a small number of exclusive outfits, but it does not rebalance combat, resource yields, or puzzle solutions. The base game is identical to the original release, and the recommended order in this walkthrough applies to both builds.
Leave a Reply