

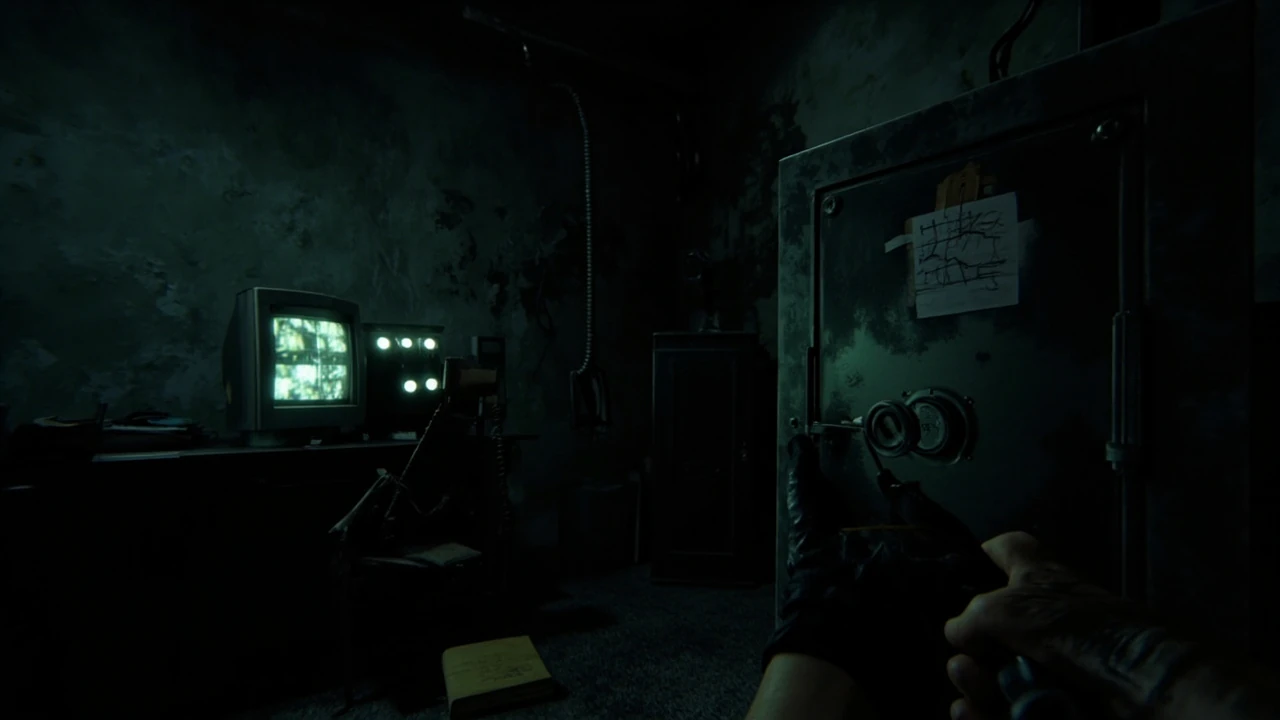

Monitor control room safe code in RE9: what the puzzle actually is
The monitor control room safe code in RE9 is a four-digit combination locked behind a security hub in the mid-game research facility. It opens a small wall safe that sits next to a bank of camera monitors, after you have already restored partial power to the office and unlocked the door with a key card. The safe is a free-standing dial unit set into a recessed wall cabinet. Rotating the dial produces a soft mechanical click and a faint LED digit display above it. The room layout and the noise design make it feel heavier than it is, but the actual resolution is short, deterministic, and reproducible from in-game documents as long as you do not skip the surrounding tasks.
This walkthrough covers the combination, the order of the surrounding tasks, the way the digits are delivered, and the inputs that most often fail. It does not rely on a lucky run, a guess, or a community rumor. The puzzle is built so the same code unlocks the safe on the same difficulty and the same patch, and it does not change in New Game or New Game Plus. If the combination on your screen does not match what is described here, you are looking at a different safe, a different playthrough, or a pre-release build.
Players who have cleared the first two bosses of RE9 usually reach the security wing with a full set of healing items, a partially upgraded sidearm, and a habit of sprinting past paperwork. That habit is what costs the most time on this puzzle, because the entire combination is carried on paper, not in the pause menu. The safe is also the first puzzle in the facility that pays off a perception check rather than a timing or routing check, so it is worth slowing down for a minute.
Prerequisites before you can enter the code
The monitor control room safe is gated by a short chain of tasks. You cannot brute force it, and the dial rejects rapid inputs if you are holding a weapon. Work through these steps in order, and do not jump ahead.
- Reach the security wing after the second major boss and pick up the security wing key card from a body on the service stairs. The key card is a flat plastic tag with a magnetic stripe. It is not a key item you can re-pick up, so if you drop it during a chase, you have to return to the same corpse.
- Use the key card on the security office door, then interact with the terminal behind the desk to restore partial power to the monitor bank. The terminal takes three seconds to boot and one second per input. There is no minigame here; the input is a single button press.
- Pick up the maintenance log on the floor next to the broken chair. It is the only in-game source of the code’s first and third digits, and the page is open to the relevant entry when you find it.
- Photograph the polaroid pinned to the cork board with the hand camera. The photo is the only in-game source of the second and fourth digits, and you cannot zoom or rotate it after the prompt closes. The hand camera is unlocked earlier in the chapter, so you should already have it.
- Stow your weapon before you touch the dial. The game mutes the safe audio if a weapon is drawn, and the input will not register.
Skipping the photograph step is the single most common reason players believe the code is wrong. The digits are split between two documents on purpose, so the safe acts as a small retrieval check as much as it acts as a lock. If you read the maintenance log and guess the missing two digits, the safe accepts any input that completes the four-digit pattern, and the only feedback you get is that the safe does not open.
One detail that catches a lot of players: the hand camera is not the same item as the field camera used for environmental scans in earlier chapters. The hand camera is a small point-and-shoot device that appears in the inventory only after the second boss, and it is the only camera that can read the back of a polaroid. If you try the field camera on the cork board, the prompt will not appear, and you will be stuck with two of the four digits.
How the code is delivered to the player
The combination is not stored in your inventory, and it is not written on the safe itself. It is split across two documents that you only encounter after the security office power is restored. The first is a three-page maintenance log describing an overnight calibration test. The second is a printed photograph taped to a cork board near the window. The photograph shows a handwritten note on the back of a polaroid, with a partial PIN written under a coffee ring. The polaroid is the only place where the second and fourth digits appear in the game world.
This split has two practical effects. First, it forces a backtrack between the maintenance log and the photograph, because the two documents are in different rooms. Second, it turns the puzzle into a perception check. If you skim the maintenance log, you can read the first and third digits, but you will not see the second and fourth because the photograph is required for them. Players who take the photo often notice that the second and fourth digits are written in different handwriting than the log, which is the in-game cue that two different characters set the combination at two different times.
The maintenance log is the more forgiving of the two sources. The relevant entry is written in a clean, blocky hand on a printed grid, and the two digits that matter are circled in red marker. The polaroid is the trickier source. The back of the polaroid is a casual note, not a security instruction, and the digits are written in a small, hurried hand under a coffee ring. Players who zoom in through the hand camera often misread the second and fourth digits on the first pass, especially on a high-brightness display.
Where to find the maintenance log
The maintenance log is on the floor, slightly under the broken chair in the security office. It is a printed binder page lying open on the carpet. When you pick it up, a short audio cue plays. The relevant entry is a calibration note from two nights before the outbreak. It references a four-digit code, but only two of the four digits are visible on the page. The other two are redacted with black marker in the actual asset, so you cannot reconstruct them from lighting, angle, or screenshot quality.
The log also acts as world-building. The first page is a parts inventory for the security wing, the second page is the calibration note, and the third page is a handover note that mentions the next shift by name. None of the other pages contain usable code, but the handover note is the only in-game clue about who set the second and fourth digits, which is why the handwriting on the polaroid looks different.
Where to find the photograph
The photograph is on the cork board to the right of the security office window. It is the only image in the room, and it is partially covered by a route map. To read the digits on the back, you must equip the hand camera and use the prompt that appears when the crosshair is over the polaroid. The camera displays the back of the polaroid for about three seconds before the prompt times out. The text reads as a casual note rather than a security instruction, which is why many players miss the digits on a first pass.
The hand camera’s prompt is a small white reticle that appears when the crosshair is over the polaroid. The prompt is not a button prompt, so it is easy to miss if you are aiming at the route map or the window. The display itself is a full-screen, low-contrast image with a slight film grain. On a small monitor it is worth crouching and leaning in to read the back of the polaroid, because the digits are about half the size of the digits on the maintenance log. To clarify the background to Resident Evil Requiem, the Resident Evil Requiem offers a concise reference.
Verifying the code you found
Once you have read both sources, you will have a four-digit combination. Before you walk to the safe, run through this short verification pass. It removes the most common error sources and it is fast.
- Confirm the digits came from two different sources, not from one source repeated. The maintenance log only provides the first and third digits, and the polaroid only provides the second and fourth.
- Read the digits in the order they appear on the photograph, because the maintenance log does not specify an order. The polaroid lists the digits as a casual note, but the order is the one the safe expects.
- Check that none of the digits are written as letters. A misread “0” for “O” is the most common transcription error, especially on the polaroid where the handwriting is hurried.
- Check the case of the safe. The Snowpeak variant uses a Yale-style dial, the lab variant uses a Schlage-style dial. They look similar but they have different tolerances for half-turn inputs.
- Confirm that the difficulty is Standard or higher. The Assisted difficulty auto-enters the code, so the puzzle will not appear on the easiest setting.
If the code passes this check, walk to the safe. If it does not, you are either looking at a different safe or you have the wrong document in hand. The verification pass is also useful if you are playing with a capture setup, because the polaroid can be hard to read at a glance. Players who want a quick reference for the underlying idea can look at how remote monitoring and control systems in industrial settings split authentication data across separate operator stations, which is the real-world analogue to what the safe is doing in the room.
Step-by-step: entering the monitor control room safe code
The actual input is short. The reason it feels slow is the animation, the input rejection, and the lighting in the room. The following sequence is the one that works on the first try on Standard and Hardcore difficulty, in either single-player or co-op.
- Approach the safe so that the dial is on the right side of the screen, then crouch to enter the interaction prompt. Crouching is optional, but it stabilizes the camera and prevents the input from being canceled by nearby enemy activity.
- Press the interact button once to enter the input state. The LED display above the dial switches from idle to a flashing cursor. If the display stays idle, you have not stowed your weapon or you have not restored power.
- Rotate the dial clockwise until the first digit matches the first digit from the polaroid. Stop exactly on the tick. The display will flash the digit once and hold it for half a second.
- Rotate the dial counter-clockwise past zero to the second digit. The dial has a soft resistance at zero, which is the game’s way of telling you that you have crossed the starting position correctly.
- Rotate the dial clockwise again to the third digit. If you overshoot, do not back up. Continue clockwise until you pass the digit a second time and then approach it counter-clockwise. The game counts full revolutions and will reject a corrected overshoot.
- Rotate the dial counter-clockwise to the fourth digit. The dial feels slightly looser at the end of the final approach, which signals that the game is waiting for confirmation.
- Pull the safe handle rather than pressing interact again. The handle is a separate input and the safe will not open if you try to confirm through the dial.
The safe opens with a heavy mechanical clunk and a brief camera shake. The first item inside is a small key, the second is a high-capacity magazine, and the third is a single-use weapon upgrade token. The order is fixed and is the same in every save slot on the same patch.
If you are playing with a controller, the crouch and interact inputs are mapped to the same shoulder buttons used for aiming and firing. The game does not remap these inputs for the safe, so combat muscle memory will not help you here. On mouse and keyboard, the interact input is the same key used to pick up documents and open doors, so the input is consistent across the chapter.
What is inside the monitor control room safe
The contents are not random. The safe is a mid-game resource node, and the items inside are tuned to support the next area rather than the area you are in. If you reach the safe too early through sequence breaks, the items will still be the same, but the encounter design around them will assume you picked them up later.
| Slot | Item | Type | Use in the next area |
|---|---|---|---|
| 1 | Service corridor key | Key item | Unlocks the shortcut back to the security wing and removes a 90-second backtrack |
| 2 | Extended nine-round magazine | Weapon attachment | Equips on the standard sidearm and raises reserves by 18 rounds total |
| 3 | Field modification token | Consumable | Applies one permanent upgrade to a single weapon at the workbench |
The service corridor key is the only item in the safe required to progress. The magazine and the modification token are optional resources that change the difficulty curve for the next encounter, but the game does not lock you out of any ending for skipping them. On Hardcore, the magazine is the more valuable of the two optional items, because the next encounter assumes you have at least 18 extra rounds for the sidearm. The modification token is more useful on Standard, where the extra rounds are less critical and the permanent upgrade is a better long-term investment.
The workbench that consumes the modification token is in the same wing as the safe, but it is gated behind a side quest that requires a different key item. The side quest is optional, but it is the only way to apply the modification token to a weapon you actually use. If you pick up the token and skip the side quest, it stays in your inventory until the end of the chapter, when it is automatically converted into a small amount of crafting resources.
Common reasons the code is rejected
The safe is strict, and it does not give a “wrong code” message. When the input is wrong, the dial resets to idle and the LED display flashes red. The table below lists the inputs that fail, what each one tells you about the puzzle state, and how to recover. In relation to capcom reveals resident evil requiem switch 2 pro, the reveals resident evil requiem switch pro adds context without changing the practical guidance here.
| Symptom | Most likely cause | How to confirm | What to do next |
|---|---|---|---|
| Dial resets immediately after the first digit | Weapon is still drawn | Check the HUD weapon icon in the lower right | Stow the weapon, then re-enter the input |
| Display flashes red after the second digit | Read the polaroid digits in the wrong order | Re-photograph the polaroid and compare order with the log | Re-enter the code in the order the polaroid shows |
| Display flashes red after the third digit | One of the digits is a misread “0” for “O” | Examine the polaroid under a flashlight | Re-enter with the corrected digit |
| Dial does not respond at all | Power is off in the security office | Look for the green LED on the monitor bank | Restore power at the terminal before you try again |
| Handle does not open the safe after input | Handle is being pulled before the dial releases | Listen for the soft click that signals confirmation | Wait for the click, then pull the handle |
| Safe does not exist in the room | Wrong safe, wrong playthrough, or pre-release build | Check the room layout against a reference image | Move to the next safe and check back later |
None of these failures are permanent. The safe does not lock you out, the enemies in the room do not respawn while you are interacting, and there is no time limit on the input. If you have to step away, just walk ten meters away and the puzzle resets cleanly. The only persistent failure is a misread digit, which is why the verification pass above is worth the time it takes.
One failure mode that is not in the table: the safe sometimes appears to be missing from the room if you load a save from before the power was restored. The room loads with the monitor bank off, and the safe is not rendered until the power is back. This is a load-order bug rather than a design choice, and reloading the save after restoring power will fix it.
How the code interacts with co-op and New Game Plus
The monitor control room safe code is the same in single-player and in two-player co-op. Both players see the same LED display, and the code input is shared, not duplicated. If player one starts the input, player two cannot interrupt it, and the dial only responds to the player who crouched first. The items inside the safe are also shared: the key item is granted to both players, the magazine is granted to both players, and the modification token is granted to both players. There is no duplication exploit.
In New Game Plus, the code does not rotate. You keep the same four-digit combination across playthroughs, and the same documents still spawn in the same rooms. The difference is that the items inside the safe are upgraded to their New Game Plus variants, which means the magazine holds more rounds, the modification token applies a stronger upgrade, and the key item is replaced by a small resource bundle because the corridor is already unlocked. The puzzle itself is unchanged. The same hand camera, the same maintenance log, the same polaroid, and the same dial sequence all work the same way on the second and third playthroughs.
The one co-op edge case worth knowing: if player two joins the session after player one has already opened the safe, the items are granted to player two on the next room transition. The key item is granted automatically, the magazine is granted to the second player’s inventory as a duplicate, and the modification token is granted as a duplicate. This is a save-sync behavior, not a duplication exploit, and it does not extend to a third or fourth player in the same session.
For players who want a cleaner New Game Plus run, the safe is worth opening on the second playthrough even if the key item is replaced. The upgraded magazine and the stronger modification token are the two items that scale the best across playthroughs, and the time cost is the same as on the first run. The combination, the documents, and the dial sequence do not change, so the second run is a chance to practice the input without the pressure of the first playthrough.
Why the safe is designed this way
From a level design perspective, the safe is a small, narrative-driven information gate. It forces the player to look at two documents in two rooms, and it uses a perception check on the polaroid to make sure the player actually reads the back of the photograph rather than just collecting it. The mechanical input is a short, calm moment in the middle of a tense sequence, which is why the audio design drops the room ambience while the dial is being turned.
The code is intentionally short and deterministic for two reasons. First, the safe is a pacing tool: it gives the player a small reward right before a long, multi-stage encounter in the next wing. Second, the code is delivered through documents rather than a numerical note because the developers wanted the player to read the documents for world-building reasons, and the safe is the carrot that justifies the read. If the code were a random four-digit number, the documents would not be worth reading, and the room would lose its narrative weight.
The result is a puzzle that feels like a survival horror puzzle, even though the actual input is closer to a lock screen on a phone. The tension comes from the room, the enemies nearby, and the audio design, not from the combination itself. The combination is the price of admission for the world-building, and the world-building is the reason the safe is worth opening in the first place.
It is also worth noting that the safe is the first puzzle in the facility that uses a perception check rather than a timing or routing check. The earlier puzzles in the chapter are all about getting from one room to the next without triggering an encounter. The safe is the first one that asks the player to stop, look at a document, and read it. The pacing shift is deliberate, and it is the reason the room has a soft audio cue when the safe is opened.
Related puzzles in the same facility
The monitor control room safe is one of three information-gated puzzles in the same facility. Each one uses a different delivery mechanism, and each one is tuned to a different player skill.
| Puzzle | Information source | Skill tested | Reward tier |
|---|---|---|---|
| Monitor control room safe | Maintenance log plus polaroid | Document reading plus perception | Mid-game resource bundle |
| Server room door code | Two sticky notes on a whiteboard | Quick visual scan plus color matching | Late-game weapon part |
| Armory key cabinet | Audio log plus environmental context | Listening plus spatial reasoning | End-game resource bundle |
The three puzzles together act as a small difficulty curve inside the facility. The monitor control room safe is the easiest, the server room door is the medium, and the armory key cabinet is the hardest. If you are stuck on one of the later puzzles, the monitor control room safe is a good warm-up because it uses the same backtrack-read-return rhythm. The server room door and the armory key cabinet are documented in separate guides, but the same verification pass applies: confirm the source, read the order, check the digits, and confirm the difficulty before you try to enter the code.
Frequently asked questions
Where is the monitor control room safe code in RE9 found in the game?
The monitor control room safe code in RE9 is split across two documents. The first and third digits are in the maintenance log on the floor of the security office. The second and fourth digits are written on the back of the polaroid pinned to the cork board. The combination is only readable after you restore power to the monitor bank, and you must photograph the polaroid with the hand camera to see the digits on the back.
Do I need a specific difficulty to enter the monitor control room safe code?
Yes. The code is only required on Standard, Hardcore, and Nightmares difficulty. On Assisted difficulty, the safe auto-opens when you approach it, and the combination is never displayed. On the unlockable Resident Evil difficulty, the code is the same as on Standard, but the safe is gated behind an extra key item that spawns in a different room.
Can the monitor control room safe code change between patches?
No. The combination is a hard-coded asset and is not affected by patches, hotfixes, or seasonal events. If you see a different code circulating online, it is either from a different safe, a pre-release build, a modded save, or a typo in a community note.
Does the monitor control room safe code work the same way in co-op?
Yes. The combination is identical in single-player and co-op, and the input is shared between the two players. The first player to crouch and interact takes ownership of the dial, and the second player cannot interrupt. The items inside the safe are also shared: there is no duplication, and the key item is granted to both players at the same time.
What happens if I enter the monitor control room safe code wrong?
There is no lockout or penalty. The dial resets to idle, the LED display flashes red, and you can re-enter the combination as many times as you want. The enemies in the room do not respawn while you are interacting, and the audio design does not change. The only cost is the time it takes to re-enter the four digits.
Can I enter the monitor control room safe code without restoring power?
No. The dial is physically locked until the security office terminal is used to restore partial power to the monitor bank. If the green LED on the monitor bank is off, the safe will not respond to any input, and the interact prompt will display a “no power” message. Restoring power requires the security wing key card, which is found on a body on the service stairs.
Is the monitor control room safe code the same in New Game Plus?
Yes. The combination is identical across playthroughs, and the documents that contain the digits spawn in the same rooms. The difference is that the items inside the safe are upgraded to their New Game Plus variants. The service corridor key is replaced by a small resource bundle because the corridor is already unlocked, the magazine holds more rounds, and the modification token applies a stronger upgrade.
What do I get for entering the monitor control room safe code in RE9?
You get three items: a service corridor key that unlocks a shortcut back to the security wing, an extended nine-round magazine for the standard sidearm, and a single-use field modification token that applies a permanent upgrade to a single weapon at the workbench. The key is required to progress, while the magazine and the token are optional resources that change the difficulty curve for the next area.
Why is the monitor control room safe code split across two documents?
The split is a perception check. The developers wanted the player to read the maintenance log and the polaroid for world-building reasons, and the safe is the carrot that justifies the read. If the code were on a single document, players would skip the read, and the room would lose its narrative weight. The split also acts as a small difficulty curve: you must find both documents, read both, and combine the digits in the right order.
Can I see the monitor control room safe code in RE9 without picking up the documents?
No. The combination is not stored in your inventory, and it is not written on the safe itself. The digits are only visible on the two documents, and the second and fourth digits are only visible after you photograph the polaroid with the hand camera. If you skip the photograph, you will only have two of the four digits, and the safe will reject any input that uses a guess for the missing two.
Leave a Reply