

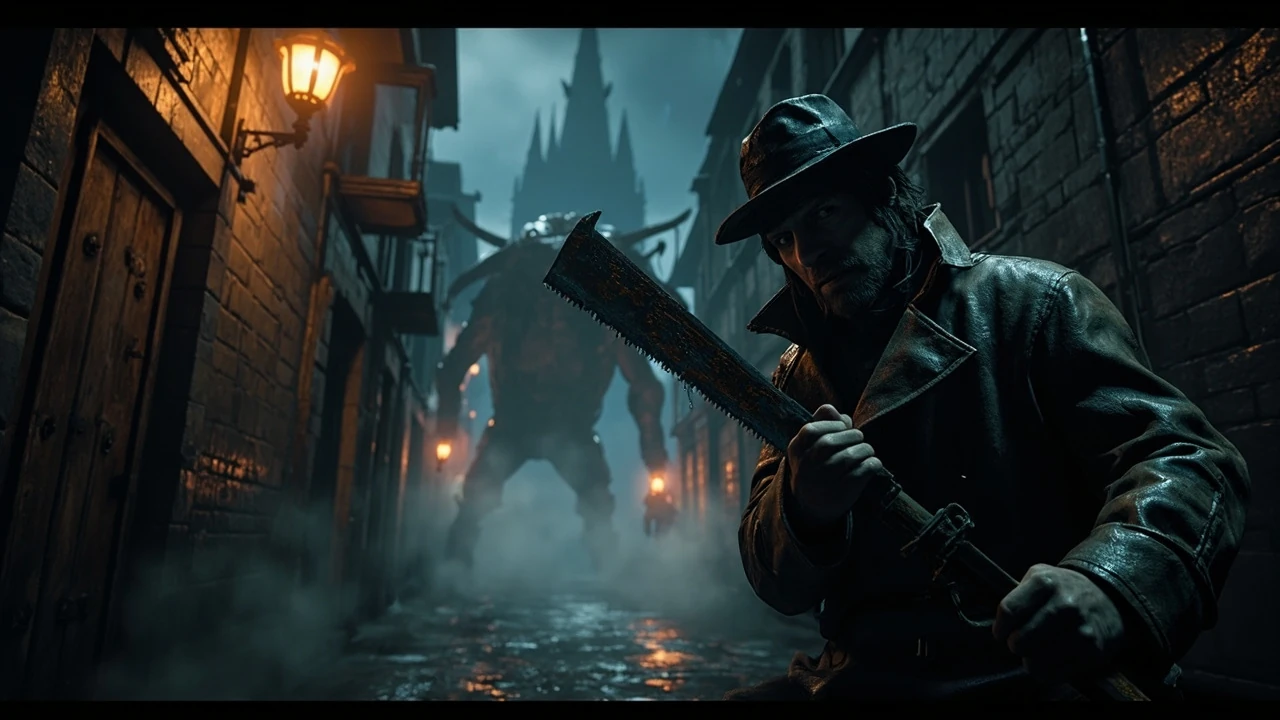

Bloodborne walkthrough: how to survive Yharnam from the first night to the final hunt
Bloodborne is a 2015 action role-playing game developed by FromSoftware for the PlayStation 4, set in the gothic, plague-ravaged city of Yharnam. Its combat rewards aggression, positioning, and timing over the defensive rolling found in earlier FromSoftware titles, and its level design is dense, vertical, and filled with shortcuts that rewire the entire map once unlocked. A reliable bloodborne walkthrough has to do more than list boss order: it has to teach the core loop of rally, parry, and exploration, then layer the right weapon, attribute spread, and item priority on top of that loop. This guide follows the order most players meet content on a first run, marks the genuine difficulty spikes, and calls out the build decisions that decide whether a boss feels fair or unfair.
Before diving in, two practical notes. First, Bloodborne runs at 30 frames per second on PS4 and the frame pacing is consistent; the game is not a frame-rate test, so treat any claim about input responsiveness as a function of your own recovery and animation commitment rather than hardware speed. Second, the game does not hand you difficulty options. The difficulty is a fixed contract between the player’s build, their route choice, and their willingness to learn enemy patterns. The walkthrough below is written for that contract.
Core mechanics every runner of the bloodborne walkthrough needs to learn first
The combat system is short and deep, but the surface rules are easy to misread. Skipping these explanations is the single biggest reason a first-time player feels the game is unfair, because every later encounter assumes you understand them.
- Rally (Recover) is your life insurance. When you take damage, you have a short window to land hits on any enemy and recover a portion of the lost HP. A failed rally is just a lost health bar; an unlearned rally means you play at half efficiency.
- Stamina is the real resource. Every attack, dodge, block, and parry consumes stamina. Running out of stamina mid-swing is the most common cause of death, because you cannot dodge the follow-up.
- Aggression opens i-frames. Pressing L1 to attack immediately after a dodge extends the dodge’s invincibility window. A common technique is to dodge into an enemy, swing once, and dodge again to extend your i-frames through the enemy’s recovery frames.
- Quickstep vs. transform attack. Light weapons like the saw cleaver quickstep in any direction, which is the safest general-purpose tool. Trick weapons with a heavier two-handed mode lose some of that mobility and trade it for reach or damage, so pick consciously.
- Parry is not mandatory, but it halves boss length. A successful parry with a firearm, followed by a visceral attack, can skip entire phases on humanoid bosses. It is a tool, not a rule.
If you only memorize one thing from this section, make it the rally system. It is what makes Bloodborne feel different from Dark Souls, and a bloodborne walkthrough that does not name it as the first mechanic to learn is leaving the most important defensive option off the table.
Build foundations: stats, weapons, and where to spend echoes
There is no class system in Bloodborne, only a starting origin that sets your initial level and one or two attributes. The actual build is shaped by which attributes you raise, which trick weapons you invest in, and which Caryll Rune you carry. The right starting spread depends on the playstyle you want, not on the weapon you happen to find first.
| Attribute | Primary use | Soft cap | When to invest |
|---|---|---|---|
| Vitality | Increases maximum HP | 40-50 | Always. Stop only when you stop dying in one hit to trash. |
| Endurance | Increases stamina and equipment load | 30-40 | Early. More stamina means more swings and more dodges per engage. |
| Strength | Scales heavy weapons like Ludwig’s Holy Blade, Kirkhammer | 25 for most quality builds, 50 for pure strength | When you commit to a heavy trick weapon. |
| Skill | Scales light/rapid weapons like the saw cleaver, blades of mercy | 25 for quality, 50 for pure skill | Default for a first run. Skill is the strongest scaling stat in the early game. |
| Bloodtinge | Scales firearms and blood weapons like the blade of mercy, Chikage | 25-50 | Only for a dedicated bloodtinge build. Skip on a first run. |
| Arcane | Powers hunter tools, elemental damage, item discovery | 25-50 for elemental, 70+ only for arcane-only | Late. A first run benefits more from raw damage and survivability than from hunter tools. |
A safe first-run spread is to take Vitality to 30-40, Endurance to 25-30, and the rest into Skill until your chosen trick weapon is at its scaling sweet spot. Strength dips into the build only when you commit to a strength-scaling weapon at low levels. Arcane is best ignored until you understand the late-game hunter tools and you have a clear reason to invest, because each level in arcane gives you almost nothing useful before the right gems and tools are available.
Early-game route: Central Yharnam to the first boss
The first zone is short but the game does not warn you about the difficulty curve. Most deaths in the opening hour come from the snipers on the rooftops, the brick giant throwing barrels, and the first mandatory boss. The opening route below assumes the standard first lamp at Central Yharnam lamp.
- From the Central Yharnam lamp, clear the central plaza. Use the messengers on the bridge as free blood echoes if you need the practice, then open the shortcut gate near the tall brick building.
- Climb to the top of the bell tower via the ladder guarded by the fire-dog. The bell is the story gate you will return to much later. Do not fight the darkbeast here on a first run unless you want a clean soul to test the rally window.
- Drop back to street level, take the side street past the brick giant, and unlock the second shortcut near the Tomb of Oedon. The shortcut ladder is the single most important navigation tool in the first three zones because it gives you a clean run back to the boss from the lamp.
- Enter the sewers. The giant rats and the lonely ogre are the first real test of your rally. Let the rats pile up to 1-2 hits, then rally back. The ogre punishes panic, so back away, fire a few shots, and punish only the slow overhead swings.
- Surface into the Tomb of Oedon chapel, then descend to the cathedral. The cleric beast waits on the bridge. If you have not been upgrading your weapon, you will feel it here. If you are under-leveled, farm the first zone for a few thousand echoes and buy the saw cleaver from the messengers if you started with the axe.
The cleric beast teaches you the standard rhythm of a Bloodborne boss: a long wind-up, a wide arc, a recovery window, and a punishment if you roll too early. Stay locked on, walk left, and punish only the recovery frames. If you keep dying, the problem is almost always greed on the punish, not the dodge.
Father Gascoigne and the first real test
Father Gascoigne is the boss of the Tomb of Oedon chapel and the first serious skill check. He has three phases, and the third is the one most players do not expect. In the first two phases he is fast but readable; in the third he transforms into a beast and the arena becomes smaller than you remember.
| Phase | Behavior | What to do |
|---|---|---|
| Phase 1 (human, axe) | Slow overheads, long recovery | Dodge right, punish once, reset distance. |
| Phase 2 (human, pistol) | Faster combos, parryable gunfire | Try one or two parries. A successful parry here ends a phase. |
| Phase 3 (beast) | Wild leaps, long combos, lower mobility | Stop parrying. Bait the leaping slam, dodge through, punish once or twice, get out. |
If you find phase 3 overwhelming, the trick is to stop playing the parry game and go back to a pure dodge-and-punish loop. The beast form has a long wind-up on its leaping slam and a much longer recovery than the human form, which is your opening. The most common mistake is trying to match his new tempo. You cannot; you have to reset yours.
Mid-game routing: Old Yharnam, the forest, and the catacombs
After defeating Father Gascoigne, the game opens up. The standard progression is Old Yharnam, the Hemwick Charnel Lane, the Forbidden Woods, and the Nightmare of Mensis, but the actual order depends on which side paths you unlock from the central hub. Use the table below to decide which route to take based on what you want from your build.
| Area | Key pickups | Why go here next |
|---|---|---|
| Old Yharnam | Flame thrower, Church Hunter set, blood echoes | First access to the flame thrower and the first visceral tutorial for hunters. |
| Hemwick Charnel Lane | Rune workshop tool, Madaras Whistle (transform), Eileen the Crow quest | Short zone, low difficulty, sets up the rune system and the first NPC questline. |
| Forbidden Woods | Booster runes, firearm variety, large enemies with slow tells | Difficulty spike for the snake-head giants, but the only source of the Ailing Loran chalice. |
| Byrgenwerth / Moonside Lake | Empty Phantasm shell, Rom the Vacuous Spider, key insight | Story-critical. Required to reach the upper cathedral and the Mensis nightmare. |
| Nightmare of Mensis | Twin Bloodstone shards, arcane tools, Mergo’s attendants | The hardest mid-game zone, but the most echoes per run if you can clear it. |
For a first run, take Old Yharnam and Hemwick Charnel Lane before any of the harder zones. The flame thrower trivializes Old Yharnam’s beast enemies, and Hemwick gives you the rune workshop tool, which is the only way to equip a Caryll Rune outside of the Forbidden Woods and the Nightmare of Mensis. The Bloodborne design assumes you will run this route in this order; trying to skip into Mensis at level 40 is the fastest way to get stuck.
Weapon recommendations by build
Trick weapons define a build more than stats do. The same stat spread plays very differently with a saw cleaver than with a Kirkhammer, and a bloodborne walkthrough that lists “best weapon” without a build context is missing the point. Use this table to match the right weapon to the kind of fights you want to take.
| Trick weapon | Stat focus | Strength | Weakness |
|---|---|---|---|
| Saw cleaver / saw spear | Skill | Best all-round starter, fast rally, great serrated damage vs. beasts. | Short reach in the untransformed mode. |
| Ludwig’s Holy Blade | Strength or Quality | Massive damage in two-handed mode, high poise damage, very forgiving in groups. | Slow transformation, low rally efficiency if your timing is off. |
| Threaded cane | Skill | Long reach in two-handed mode, serrated damage in cane mode, fast parry tool. | Lower per-hit damage than the cleaver, requires position discipline. |
| Blades of Mercy | Skill or Bloodtinge | Fastest dash-attack in the game, breaks enemy stance quickly. | Lower base damage, harder to use without bloodtinge investment. |
| Kirkhammer | Strength | Single-hit stagger on most trash, devastating two-handed slam. | Slow in one-handed mode, stamina-hungry. |
| Chikage | Bloodtinge | Highest skill-scaling damage in the late game, exceptional on transformed. | Two-handed mode drains HP per second, requires HP-stacking rune. |
| Rakuyo | Skill or Quality | Elegant in one-handed, strong in two-handed, decent thrust damage. | Lower stagger, mid-range reach only. |
For a first run, the saw cleaver or Ludwig’s Holy Blade is the most forgiving choice. The saw cleaver teaches you the rally loop and the transform attack, while Ludwig’s Holy Blade gives you the kind of single-target damage that carries you through most bosses. The Chikage and the Blades of Mercy are end-game weapons, not first-run weapons, and trying to use them without the right stat spread and rune setup will only make the run harder.
Item priority: what to spend echoes on early
Bloodborne has a small but punishing economy. The For additional context, first 10 levels feel expensive, the next 10 feel reasonable, and the last 10 feel impossible without a route that farms well. The smartest use of echoes in the early game is not levels, it is items that let you shortcut, heal, and reset. Use this list to decide what to buy first from the messengers in the Hunter’s Dream.
- Blood vials (1,600 echoes for 20). Buy these in batches of 20-40 between bosses. Do not hoard more than 60, because vials are farmable from NPC helpers and you will eventually replace them with the Sedative rune.
- Bullet packs (200 echoes for 20). Parries and gunfire cost bullets, and running out mid-boss is the most common cause of failed parry attempts. Buy two to three stacks every time you level up.
- Upgrade materials. Twin Bloodstone Shards, Bloodstone Chunks, and Blood Rocks are the only way to scale a weapon. Spend echoes on the materials first, then on levels, because a +3 weapon at level 30 beats a +1 weapon at level 45 against most bosses.
- Quicksilver Bullets and the Augur of Ebrietas. The Augur is a hunter tool that lets you dodge forward through attacks, and it is a strong panic button on certain bosses. Save the echoes for it once you have 1-2 level-ups in arcane.
- Caryll Runes. The Clawmark, Bloodlust, and Oedon Writhe runes are the most common first picks. Clawmark boosts visceral damage, Bloodlust boosts rally, and Oedon Writhe raises discovery for better gem drops.
The single biggest mistake in early-game item use is treating echoes as a level-only currency. Levels matter, but a well-timed upgrade and a small stack of bullets will do more for your win rate than three attribute points.
Bosses by region: difficulty, tells, and the runback
Runbacks are part of the boss design. A short runback means a learning-friendly fight; a long runback means a single mistake costs a minute or more of replay. The table below orders the mandatory bosses by where they appear on a standard first run, and rates their runback difficulty so you can decide whether to push on or farm echoes first.
| Boss | Region | Approximate runback | Tells and the safe punish |
|---|---|---|---|
| Cleric Beast | Great Bridge | Short, one ladder | Long wind-up on the slam. Dodge left, punish the recovery, reset distance. |
| Father Gascoigne | Tomb of Oedon | Short, two shortcuts | Parry in phase 2, pure dodge in phase 3. Never over-commit. |
| Blood-starved Beast | Old Yharnam | Short | Flame thrower trivializes the poison. Dodge the head swipe, bait the leap, punish once. |
| The Witch of Hemwick | Hemwick Charnel Lane | Short | Ignore the boss body. Kill the adds. Stamina management is the whole fight. |
| Darkbeast Paarl | Hypogean Gaol (optional) | Short | Stay close. He punishes distance. Punish the electricity recovery window. |
| Shadow of Yharnam | Forbidden Woods | Medium, one ladder | Kill the snake projectiles first. Bait the clone attack, punish the recovery. |
| Rom the Vacuous Spider | Moonside Lake | Medium, narrow corridor | Ignore the spiders. Walk slowly under Rom, swing only when she raises her body. |
| Amygdala | Nightmare Frontier (optional) | Medium | Stay under the head, punish the jumping stomp and the chain arm sweep. |
| Micolash, Host of the Nightmare | Nightmare of Mensis | Long, two ladders | Follow him, dodge the Augur, chase through the maze. The real fight is the chase. |
| Mergo’s Wet Nurse | Nightmare of Mensis | Medium, narrow | Dodge the slash, punish once. Stay in the arena center; the edges are death. |
The single most important pattern in this table is that the first six bosses are designed to teach the rally, the parry, the transform, and the positioning loop. By the time you reach Micolash, you should be able to read a wind-up, choose a dodge direction, and punish the recovery. If you are not yet there, the smartest move is to clear the optional chalice dungeons, not to grind echoes in a single zone.
Chalice dungeons: optional, but the best echo and gem source
The chalice system is Bloodborne’s procedural dungeon mode, and a bloodborne walkthrough that ignores it is leaving half the game’s loot on the table. The system is also the only realistic way to farm blood echoes at the level you need them. The fixed-depth chalices (Pthumeru, Central, Isz) are the easiest to clear, and they are gated by story progression, not by level.
- Pthumeru Chalice. The first dungeon. Drops the first radial gems, which raise damage against specific enemy types. Use it to upgrade your weapon past +5.
- Central Pthumeru Chalice. Drops the first waning gems, which give flat stat boosts and the kinds of secondary effects you cannot get elsewhere.
- Ailing Loran Chalice. The best source of triangle gems and beast-killer gems, which are required to optimize a serrated weapon build.
- Isz Chalice. The best source of arcane gems, which are required for any elemental or arcane hunter tool build.
- Defiled Chalice. Hardest of the four, but the only place to farm the deepest boss echoes without going to the DLC.
The dungeon strategy is to clear the first three layers of a chalice once, then return only to the boss room of the third layer. The boss is farmable, the echoes are useful, and the gems you pick up along the way will outscale any equivalent loot from the main story. The fixed-depth chalices also drop the materials for the next, harder chalice, so the system unlocks itself as you play it.
The Old Hunters DLC: when to play it and why
The Old Hunters is a large, late-game DLC that adds new weapons, new areas, and a string of bosses that include the two hardest fights in the game. The DLC unlocks after defeating Rom the Vacuous Spider and returning to the Hunter’s Dream. The choice to play it before or after the main story is a real strategic decision, because the DLC boss level scales with your own level but the boss AI does not.
- Play the DLC first if you are level 70-90. The DLC’s first boss is the easiest of the bunch, and the rest of the run is the perfect difficulty curve for a character at this level. You will not need extra echo farming.
- Play the DLC after the main story if you are under level 60. The late bosses will one-shot you and the runbacks are long. The main story is a better place to spend that experience.
- Play the DLC on NG+ if you are a completionist. The DLC’s final boss has the most generous drop in the game and is the only way to acquire the Milkweed rune without chalice grinding.
A common mistake is to start the DLC the moment it is unlocked, even on a level 40 character, because the new areas are visible on the map. The areas are visible, but the content is balanced for late game. Wait until your main weapon is at +6 or higher and your Vitality is at 30 or more before taking the boat to the research hall.
Build archetypes: how to commit to a playstyle
Bloodborne does not have a class system, but it does have three distinct build archetypes that the game expects you to lean into. The archetypes are not strict, and the game rewards hybrid builds, but each one has a clear feel and a clear failure mode.
| Archetype | Stat focus | Weapons | Failure mode |
|---|---|---|---|
| Quality / Skill-first | Skill 25, Strength 25, Vitality 35, Endurance 25 | Saw cleaver, Ludwig’s Holy Blade, threaded cane, blades of mercy | Low stagger damage. Stamina runs out against heavy bosses. |
| Strength-first | Strength 40, Skill 15, Vitality 35, Endurance 25 | Ludwig’s Holy Blade, Kirkhammer, Stake Driver | Slow recovery windows. Over-extension on punish. |
| Bloodtinge / Arcane | Bloodtinge 40-50 or Arcane 40-50, Vitality 35, Endurance 20 | Chikage, Blade of Mercy, Reiterpallasch, elemental tools | Glass cannon. Two mistakes and the run is over. |
| Arcane-tool hybrid | Arcane 35, Vitality 30, Endurance 25, Skill 20 | Any scaling weapon, A Call Beyond, Augur of Ebrietas | Tools are slow. A missed cast opens you to long punishes. |
The first-run best practice is to start as a Skill or Quality build, reach the late game at Vitality 30-40 and Skill 25, then decide whether to re-spec into Bloodtinge or Arcane. Respecs in Bloodborne are not free; they cost a rare material, so commit to a hybrid only when you are sure the late-game playstyle matches the late-game content.
Common deaths and how to fix them
Almost every death in Bloodborne is the same handful of mistakes, and almost every fix is the same handful of disciplines. The list below is the one to print out and keep next to the couch for a first run.
- Death to a fast boss combo after a parry miss. Stop parrying for a phase. Go back to dodge-and-punish. The parry will be there next attempt.
- Death to the second enemy in a group. Use the augur of ebrietas or the hunter’s axe transform to knock down the first enemy, then focus the second.
- Death to poison. Carry the Poison Resistance rune and the Oddly Good Antidote. If you are in a poison zone, the rune is mandatory.
- Death to falling. The Cathedral Ward and the Nightmare Frontier have invisible edges. Walk, do not run, near ledges until you know the safe path.
- Death to an NPC hunter. Their parry windows are tighter than the boss’s. If you are losing to a PvE hunter, back off and use a firearm-only strategy until you read the openings.
- Death to a transformation animation. The transform animation is not a parry tool. Treat it as a wind-up with a longer recovery than a normal swing.
- Death to the “two hits left” panic. When you are below 30 percent HP, your instinct will tell you to heal. Often the right move is to rally off the next enemy, not to heal. Practice the rally first; it is more reliable than the vial.
How to read the story without skipping the gameplay
Bloodborne’s story is told through item descriptions, environmental details, and the rare NPC line. The plot is dense and the timeline is non-linear, which is why many players reach the final cutscene without a clear sense of what happened. The walkthrough below does not summarize the ending, but it does mark the moments where paying attention to an item description pays off.
- The Oedon chapel item descriptions are the first coherent lore drop. Read them before you fight Father Gascoigne.
- The Byrgenwerth lecture notes explain the upper-cathedral plan. Read them in order; the slide order matters.
- The Kos egg, found in the Fishing Hamlet, is the only lore source for the ending you did not take. Read it only if you plan to take the third ending.
- The Mensis choir symbols are easier to read on a second run. Skip them on the first run unless you are deeply curious.
The story does not change the gameplay, but the gameplay rewards the player who knows what the Choir was trying to do, and what the Great Ones wanted. The item descriptions are the designer’s commentary on the system, and reading them turns a tough run into a layered one.
Speedrun and no-hit context: when the rules change
If you decide to challenge the game without a hit, or to speedrun the main story, the priorities in this walkthrough invert. A no-hit run focuses on damage output, rally discipline, and boss memorization above all else, and a speedrun focuses on route shortcuts and skip glitches. Neither playstyle is the right way to play the game for a first run, but both are worth understanding if you plan to play more than once.
| Playstyle | Recommended weapon | Recommended level | Key technique |
|---|---|---|---|
| First run / casual | Saw cleaver, threaded cane | 30-50 | Rally discipline, dodge-and-punish |
| All bosses / completionist | Ludwig’s Holy Blade, Chikage | 70-90 | Parry on humanoid bosses, elemental coverage |
| No-hit run | Blades of Mercy, Rakuyo | 120-150 | Audio cues, stamina management, no over-commit |
| Main story speedrun | Kirkhammer, saw cleaver | 40-60 | Skip glitches, route memorization, fast lantern resets |
For most readers, the first-run column is the right one. The completionist and no-hit columns assume a level of mastery that only comes from a first run, and the speedrun column assumes a level of system knowledge that only comes from watching a run. The right order is to play the game, then to read this section, then to decide whether to return for a second pass.
New Game Plus, returning, and what to keep
After you defeat the final boss and watch the cutscene, you can begin a new game plus with your character. NG+ keeps your level, your weapons, your runes, and your cosmetic items, but it resets the boss HP upward and the echo reward downward. The right way to approach NG+ is to pick a single build goal and execute it, because the difficulty curve is steeper and the room for error is smaller.
- NG+ and NG++ are the right place for bloodtinge and arcane builds. The late game unlocks the gem tiers and the rune you need, and the difficulty curve is steep enough that the extra damage is welcome.
- Chalice dungeons do not scale with NG cycle. They stay at the original difficulty, which makes them the right place to farm echoes for a build you cannot progress on the main story.
- Covenant runes carry over. The Milkweed, the Oedon Writhe, and the Corruption runes are useful on every NG cycle, so pick the rune that matches your late-game build before you start the next one.
- Save the “extra” echoes for the final upgrade. The +10 weapon upgrade requires a Blood Rock, which is rare. Save the echoes for the upgrade you actually use, not for a level you will not benefit from.
The most common NG+ mistake is to assume the same build will keep working. It will not. The damage curve increases faster than the level curve, so the same Vitality and Endurance will not save you against the same bosses. Re-spec or re-equip before starting the cycle.
Troubleshooting: when the build, the run, or the route stops working
The most common reason a Bloodborne run stalls is not a level problem. It is a build problem, a route problem, or a stamina problem. The diagnostic list below covers the most common stalls, and the order is intentional: fix the most likely cause first, not the most expensive one.
- Stuck on a boss for more than 10 attempts. The first thing to check is your weapon upgrade. A +3 to +4 upgrade is the single biggest jump in damage and is often the missing piece. The second is your rally timing; a missed rally is a missed heal.
- Stuck on a trash zone for more than 30 minutes. The first thing to check is your route. If you are taking the Forbidden Woods at level 30, the right move is to leave and come back from the Byrgenwerth lamp later. The second is your rally on the rats and the dogs, which give free HP back.
- Stuck at a certain HP threshold. The fix is almost always a Vitality point, not a new weapon. Each point in Vitality at the 30-40 range gives more effective HP than the same point in Skill, because the difference between one-shot and two-shot is worth more than the damage on the punish.
- Stuck on a specific boss phase. The first thing to check is the parry timing. If you have not parried the phase yet, the parry is the right tool. If you have parried it but it lands inconsistently, the dodge is the right tool. Do not switch between the two in the middle of an attempt.
- Stuck on a chalice boss. The first thing to check is the ritual material level. Lowering the ritual material level makes the boss weaker and is the right move when the deeper version is not part of the build goal.
The walkthrough above is written to address these stalls by route, build, and tool, but no walkthrough can replace a personal play session. The right next step is to take the recommendation that matches your current stall, try it for an hour, and re-evaluate.
Frequently asked questions
What is the best starting weapon in the bloodborne walkthrough?
The saw cleaver is the most forgiving starting weapon and the recommended default for a first run. The threaded cane is a strong alternative for players who prefer thrust damage and longer reach in two-handed mode. The axe is workable but slower than the saw cleaver on most early encounters. Pick the weapon that matches your preferred dodge timing, not the one that the community calls the “best,” because the best weapon is the one you actually use.
How do I parry consistently in Bloodborne?
Parry timing is learned on trash enemies, not on bosses. Practice the timing on a single Yharnamite by firing the moment the hand starts the wind-up, not the moment the gun is in the air. The parry window in Bloodborne is generous, but it is not infinite, and the difference between parry and no-parry is usually 6-10 frames. The Blunderbuss and the Hunter’s Pistol have slightly different parry windows, so pick one firearm and stick with it for at least an hour before judging the timing.
When should I do the Old Hunters DLC?
The Old Hunters DLC is balanced for level 70-90 characters with at least a +6 weapon. Going in earlier is technically possible, but the late bosses will one-shot you and the runbacks are long. The right time is after you have completed the main story or after you have cleared at least three of the chalice dungeons. The DLC also has a soft level cap on the final boss that respects your current level but not the level you were when you entered, so do not be afraid to spend a few echoes before starting.
Is it worth playing the chalice dungeons on a first run?
Yes, but only the first three fixed-depth chalices. The Pthumeru, Central Pthumeru, and Ailing Loran chalices give you the radial and triangle gems you need to optimize a build, and the depth-3 boss runs are short enough to clear in 20-30 minutes. The deeper chalices are not required to finish the main story, but they are the best source of late-game echoes and the only way to acquire a few rare gems without farming the DLC.
What is the easiest build for a first run?
The Skill-focused build with the saw cleaver is the easiest first-run build. Skill is the strongest scaling stat in the early game, the saw cleaver is the most forgiving weapon, and the rally loop is built for the saw cleaver’s transform attack. A Strength-focused build with Ludwig’s Holy Blade is a close second, but it requires a level spread that the first three zones do not reward. Bloodtinge and Arcane builds are not recommended for a first run because they require gems and runes that the first three zones do not give you.
How do I get the secret ending?
To get the third ending, you need to find three specific umbilical cords: one in the Nightmare of Mensis, one in the Research Hall (Old Hunters DLC), and one in the Fishing Hamlet (Old Hunters DLC). Consume all three before you defeat the final boss and the option to refuse will appear. The first umbilical cord is missable, so do not leave the Nightmare of Mensis without picking it up from the broken ritual altar.
Why do I keep dying to a specific boss even at high level?
Level matters less than build, weapon upgrade, and route. A level 80 character with a +4 weapon will lose to a level 60 character with a +7 weapon, because the upgrade scaling is steeper than the level scaling past 50. Check your weapon upgrade first, your Vitality second, and your rally timing third. If all three are right and you are still dying, the answer is to lower the ritual material on the chalice or to clear a different zone first and return when the boss feels easier.
What is the best way to farm blood echoes?
The fastest echo farm on a first run is the Mergo’s Attendant run in the Nightmare of Mensis, but the run is gated by the hardest mid-game boss. The second-fastest is the chalice depth-3 boss, which is farmable at any level with the right materials. For a first run, the best echo farm is the area just before the Cleric Beast, where the two brick giants drop a large amount of echoes for a few minutes of clearing. Save the higher-tier farms for the late game when the difficulty curve has caught up.
Should I use the Hunter’s Axe or the Saw Cleaver?
Pick the Saw Cleaver. The Hunter’s Axe has a slightly higher base damage in the untransformed mode, but the Saw Cleaver has better serrated damage against beasts, a faster transform attack, and a more forgiving rally window. The two are functionally similar, but the Saw Cleaver is the more common first-run pick because it scales with Skill, which is the strongest scaling stat in the early game.
Can I respec my character in Bloodborne?
Yes, but it is not free. You can respec at the Hunter’s Dream after you have acquired the Caryll Rune from the chalice, and the respec cost is a fixed amount of echoes plus the rune. Most first-run players do not respec at all because the Skill-focused spread works for the whole game. Late-game players use the respec to commit to a bloodtinge or arcane build that the early game cannot support.
Where to go from here
Once you have finished the bloodborne walkthrough above, the next practical step is to commit to a single build goal and clear the rest of the content with that goal in mind. The game’s NG+ cycle respects your build, the chalice system rewards the right gem coverage, and the DLC unlocks the most generous weapon drops in the game. Treat the walkthrough as a foundation, not a checklist. The system rewards the player who understands the rally, the parry, and the route in equal measure, and the player who treats the run as a system rather than a list of bosses. The hunter who survives Yharnam is the hunter who reads the wind-up, chooses the dodge, and commits to the punish.
Leave a Reply