

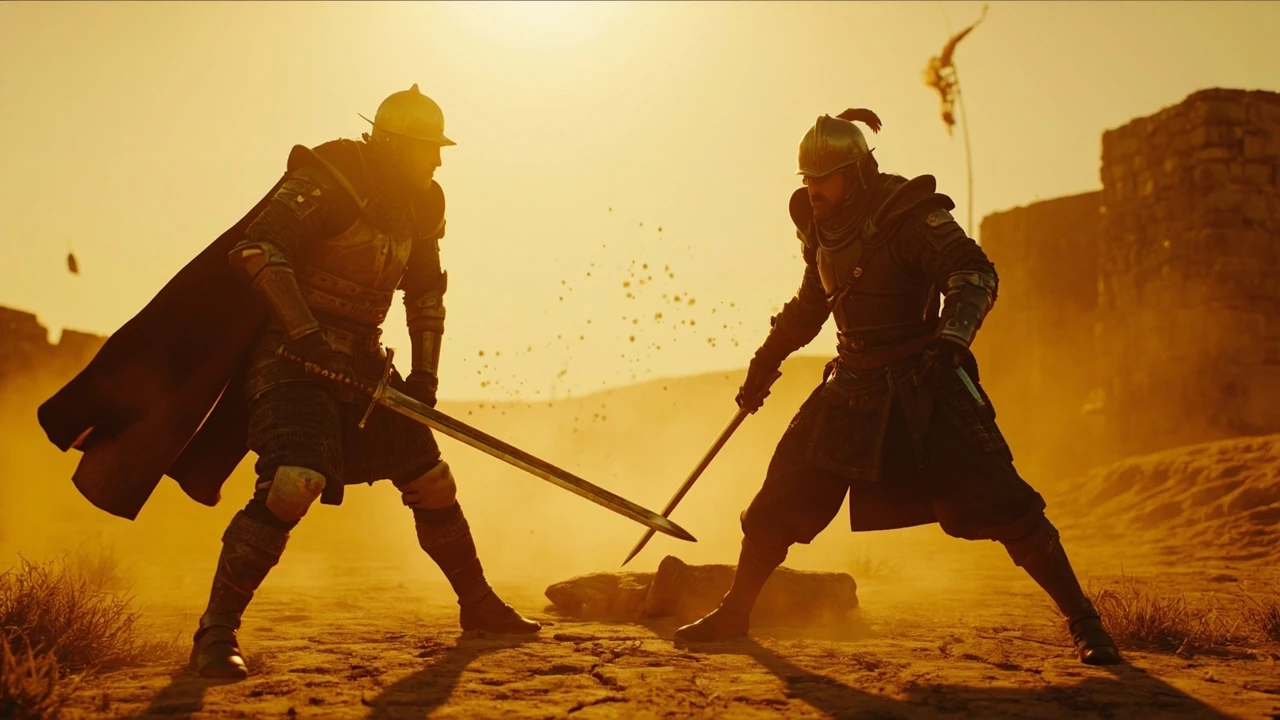

Close threat Crimson Desert: how the melee ring actually works
Close threat in Crimson Desert is the band of distance where a weapon can land before the target can complete a counter-read, and almost every fight in the game eventually collapses into that band. Pearl Abyss has built its action combat around the idea that an attack is not an event but a negotiation: the attacker has to commit a hurtbox, the defender has to read the commit, and the space between them is what makes the read possible. The result is a melee system that feels generous at midrange and unforgiving the moment two fighters step inside arm’s length without a plan. Understanding that ring is the difference between winning an encounter on the first clash and getting traded down to a sliver of health because every swing turned into a race condition.
Most new players notice the close threat ring the hard way. They sprint at an enemy, swing once, and watch the swing sail past a target that has already sidestepped. They take a return hit they never saw coming, because the enemy’s counter animation started before the player’s windup finished. The problem is rarely input lag. It is a mismatch between the player’s mental model of range and the way the hurtbox, the weapon arc, and the i-frame windows are actually timed. Once a player accepts that close threat is a measurement problem, not a reflex problem, the combat opens up. This guide walks through how that measurement works, what enemy telegraphs reveal, how the party influences spacing, and which practice loops build reliable close-range reads.
Why the close threat band is so punishing in the early hours
The first region of the game introduces you to a combat model where the enemy decides the tempo. Many early opponents have generous counter windows, low stamina, and basic combos, which sounds easy on paper. In practice, the early game teaches a brutal lesson: if you spend the whole fight at arm’s length, you give the AI time to set up a stagger or a parry that costs more than a clean hit is worth. The close threat band is where you can either interrupt a windup or be interrupted by one, and the early game punishes hesitation on both sides.
There is also an asymmetric element. Many early enemies are tuned around player assumptions from other open-world action games: that a dodge will always give you a free hit, that a heavy attack will stagger, that an enemy will flinch after one connecting swing. Crimson Desert does not honour those assumptions consistently. Some foes have low poise and will fold under sustained pressure; others will simply eat a hit and counter because their attack is already in the active frames. Reading which is which is the heart of the close threat problem, and it is the reason the game feels chaotic until you start paying attention to posture, weapon type, and spacing together instead of separately.
The anatomy of a close threat exchange
Every close threat exchange in Crimson Desert can be broken into four overlapping stages, even if they blur together in real combat.
- Approach: the distance shrinks from outside the weapon’s effective reach into the close threat band, usually through a sprint, a dodge, or a sidestep.
- Commit: the attacker chooses an attack, and the windup frames begin. During this stage, the attacker has reduced ability to cancel into a block or a different attack.
- Active: the weapon’s hurtbox is live, and the defender has a short window in which a read can produce a parry, a deflect, a dodge, or a counter.
- Recovery: the attack ends, the attacker is vulnerable to a read on their ending frames, and the cycle restarts.
The reason close threat feels so tense is that two of these stages, commit and recovery, are shared by both fighters simultaneously. When you swing, your enemy is also committing, and the difference in who completes their active frames first is the entire fight. This is why “just attack faster” is bad advice. You cannot make the active frames shorter by mashing; you can only choose commits that finish before or after the enemy’s own commit window, which is fundamentally a spacing and timing decision.
What the game means by “threat” in the HUD and the tutorial
Players sometimes look for a literal “threat meter” in the user interface and come away confused. The game does not display a numeric threat value the way some action RPGs do. What it calls threat is closer to the visible and audible cues that an enemy is about to commit: a shoulder dip before a heavy swing, a grip change before a thrust, a foot stamp before a shockwave, a weapon raised above the head before an overhead. The tutorial text frames it as the space in which a single read can decide the exchange, and that is the more useful mental model. Treat the word “threat” as a category of attack whose timing you must read, not as a numeric stat.
Why the word “close” matters more than the word “threat”
The “close” half of the phrase is doing more work than people expect. Crimson Desert’s combat is built so that many of the most dangerous attacks only become truly dangerous at close range. The same enemy with a greatsword is a manageable midrange fight and a brutal close-range one, because at close range their sweep covers almost a full 180 degrees and their follow-up overhead becomes a one-shot on light armour. Players who try to win by kiting at midrange will often succeed against single enemies and get overwhelmed by groups, because groups collapse the close threat band onto you. The moment two enemies share your close ring, you are inside both of their commit windows at once, and the game punishes that with cross-cut combos that are very hard to interrupt.
How Pearl Abyss has talked about the design
In developer interviews, the team has described the goal as a system where “every enemy feels like a duel.” That language is a useful tell. It means the studio is more interested in readable one-on-one combat than in flashy combos, and it means the close threat band is intentionally where most of the system’s depth lives. The studio’s broader design philosophy for the open world, with its emphasis on horseback traversal, long sightlines, and contested points of interest, is what creates the midrange layer; the close threat band is where the actual combat is supposed to be settled.
A short note on terminology used in this guide
Different players use different words for the same thing. To keep the rest of this article consistent, the following terms will be used in the same way throughout.
| Term | Meaning in this guide | Why it matters |
|---|---|---|
| Close threat band | The range in which a defender can read a windup and choose a counter before the active frames land. | This is the “close threat” the game keeps teaching you to manage. |
| Commit | The window during which the attacker has begun a windup and cannot safely cancel. | You want to read the commit, not the active frames. |
| Active frames | The frames in which the weapon’s hurtbox is live and damage resolves. | The shortest and most important window to track. |
| Poise | A hidden value that determines whether an enemy flinches or continues their attack when hit. | Determines whether you can stagger out of a close threat exchange. |
| Deflect | A timed block that turns a hit into a stagger on the attacker. | The intended counter to a committed close threat swing. |
| Sidestep | A directional dodge that puts the defender outside the active frames. | The safer but riskier alternative to a deflect. |
| Party AI behaviour | How your allies react to the same close threat band you are in. | Determines whether ganks feel fair or stacked against you. |
Reading the close threat band before the swing
The single most useful skill in Crimson Desert’s melee is the read that happens before the swing, and the close threat band is where reads are the most profitable. A clean read produces a deflect, a stagger, and a follow-up combo with no health loss. A missed read produces a trade or a worse outcome. Players who climb the skill curve fastest are not the ones with the best reflexes; they are the ones who learn to predict the commit from posture rather than from reaction to motion.
The three pre-swing tells to track
Almost every committed attack in the game advertises itself with the same three tells. The order can change, the intensity can change, but the categories are consistent.
- Grip change: the enemy adjusts their hand on the weapon, often sliding it forward for a thrust or choking up for a faster swing.
- Footwork: a step forward, a weight shift, or a planted back foot that loads into a heavy attack.
- Shoulder or head lead: the shoulders or head dip slightly in the direction of the next swing, sometimes accompanied by a vocal grunt.
Each tell is a small commitment animation. Together, they form a longer total warning than the active frames themselves. The reason that close threat feels like a guessing game at first is that players tend to watch only the weapon, which is the last thing to move. Watching the shoulders and the feet gives you an extra beat to choose between a deflect, a sidestep, and a counter of your own. This is the practical core of every high-level play you will see online, and it is also what the developer is most clearly trying to teach you through the combat tutorial pop-ups.
How weapon type changes the close threat read
The shape of the hurtbox and the speed of the windup change by weapon class, and the close threat band feels different against each. The general patterns below hold for most early-to-mid game enemies.
| Weapon class | Typical close threat feel | Best read cue | Common mistake |
|---|---|---|---|
| One-handed sword | Fast, multiple-hit combos, short reach. | Grip change and the direction of the leading elbow. | Panic-blocking after the first hit and getting clipped by the second. |
| Two-handed sword | Slower, single big swings, long reach. | Foot plant and shoulder lead before the overhead. | Dodging too early because the windup looks committed already. |
| Spear | Thrust-heavy, very long reach, narrow active window. | Back-foot loading and the haft pulling back before the thrust. | Standing still and trying to deflect from outside effective range. |
| Axe or maul | Slowest windups, biggest punish on whiff. | Whole-body weight drop, often with a vocal tell. | Attacking into the windup instead of waiting for the recovery. |
| Dual blades | Two interleaved swings, both must be dealt with. | The first swing and a pause before the second. | Deflecting the first and forgetting the second is also live. |
| These patterns shift in higher difficulty regions and against bosses, but the cue categories remain stable. | |||
The cleanest way to learn the band on a new weapon
When you switch weapon classes, your old reads will not transfer cleanly. The active frames, the reach, and the i-frames on your own dodge all change, so the close threat band is a different shape. The fastest way to recalibrate is to spend ten minutes on a low-threat enemy with the new weapon, with no goal other than to count the number of tells before a swing and to track which tell reliably predicts a thrust versus a sweep. The number is usually between two and four. After a few duels, the tells become a single pre-attack shape rather than a list, and that is when close threat starts to feel like a game of inches rather than a guessing game.
Defensive options inside the close threat band
You have three broad choices when an enemy enters your close threat band: block, deflect, or sidestep. Each option is correct in different situations, and choosing between them is the core decision the combat is testing. The mistake most players make is to pick one option and ride it, usually block, because it feels safe. Safe in the moment, yes. Safe as a strategy, no, because blocked hits still cost stamina and posture, and the AI is tuned to capitalise on a defender who never retaliates.
Blocking: the stamina and posture cost
Blocking is a real option, not a default. A clean block costs stamina and may push your character back by a small step, which is itself a tell to the enemy. If you block two or three attacks in a row, several things happen: your stamina bar drops, your character’s posture may crack, and the enemy may switch to a guard-breaking attack. Block is the right call when you have not yet identified the right tell to deflect, and it is the right call when facing an enemy type whose active frames you have not memorised. As a permanent strategy, however, it loses to anything that pressures stamina or to enemies with multi-hit combos that ignore posture.
Deflecting: turning the read into damage
Deflecting is the intended counter to a committed swing. It requires a timed block input during the active frames, and a successful deflect both staggers the attacker and opens a brief window for a guaranteed counter combo. The risk is that a mistimed deflect is just a block that costs extra stamina, and a deflect against an unblockable attack can be punished hard. The reward, when it lands, is one of the most satisfying moments in the game: a clean stagger, a free combo, and a clear demonstration that you read the close threat band correctly.
The honest truth is that the timing window for a deflect is generous compared to many action RPGs, but only when you have already identified the right swing to deflect. The hard part is the choice, not the press. Once you have decided “this is the swing I am going to deflect,” the input itself is quite forgiving.
Sidestepping: trading safety for position
Sidestepping a committed swing puts you outside the active frames entirely and often lands you in a position to hit a vulnerable flank. The trade is that a sidestep does no damage, costs stamina, and leaves you briefly exposed if you guessed the direction wrong. The directional input is also a real commitment: a sidestep to the wrong side still commits your i-frames, and the recovery can be punished by a follow-up swing. Players who favour sidesteps tend to be more aggressive overall, because the goal is to end up in a better position to swing back, not just to survive.
Decision rule of thumb
For most players, the easiest rule to internalise is “deflect what I can read, sidestep what I cannot, block only when I am out of position.” That three-tier mental model prevents the worst habit, which is mindlessly holding block. It also sets up a natural skill progression: as you learn more reads, more of your defensive options shift from block to deflect, and the fights speed up because the enemy is staggered more often.
Offensive options inside the close threat band
Attacking inside the close threat band is the more dangerous half of the system, and the half the game is less explicit about teaching. The most common failure mode is to swing first and think second. The most successful approach is to swing with a plan for what happens if the swing misses, gets blocked, or gets deflected by the enemy.
Light, heavy, and the in-between
Crimson For additional context, Desert’s melee attacks divide into light, heavy, and a small set of mid-commit options. Light attacks are fast and chainable, but they do low poise damage and tend to be deflected cleanly by enemies that are ready for them. Heavy attacks are slow and high-commit, but they generate more stagger and are the right call when an enemy is recovering from their own swing. Mid-commit options include charged attacks and weapon arts, and they are the most situation-dependent: devastating when timed, expensive when misused.
The “attack into recovery” rule
The single most reliable close-range rule is to attack during the enemy’s recovery, not during their commit. Recovery frames are the only window in which the enemy cannot reliably counter. Commit frames are the only window in which they can. This rule looks obvious in writing, but in practice it goes against the instinct to attack first, because attacking into commit feels productive. It is not. A clean hit on a recovering enemy produces a stagger and a combo; a clean hit on a committing enemy produces a trade at best and a one-shot at worst.
Combo extenders and the stamina cost of finishing a string
Every weapon has a combo string with three to six inputs, and the longer the string, the higher the stamina cost and the longer the recovery. Players who chase the full string often get deflected on the last hit and punished on the recovery. A practical discipline is to end combos early on a read: two or three hits, then a guard, then a reposition. The damage difference between a five-hit string and a disciplined three-hit string is much smaller than the damage difference between a finished string and a string that ends in a deflect.
How party members change the close threat calculation
Crimson Desert is not a solo action game, and the close threat band is not just the space between you and one enemy. It is also the space between you, your party, and every enemy the party is currently fighting. The combat system expects you to manage that shared space, and ignoring the party is the fastest way to feel like the AI is cheating.
Party threat distribution
Your party members draw their own close threat bands, and enemies will swap targets when one party member is staggered, low on health, or out of position. This is actually useful: you can lower the pressure on yourself by deliberately creating a threat elsewhere, then returning to the close range when the enemy’s attention is on an ally. The catch is that your allies’ AI is not always optimal, and an ally who overextends will pull more enemies into your close band, not fewer.
Coordinated combos and friendly fire
Many party abilities are designed to set up close threat reads. A well-timed ally stagger puts an enemy into a long recovery window, which is your cue to swing. A poorly-timed ally swing interrupts your own windup and turns a clean exchange into a recovery. The honest truth is that the game’s party coordination is not perfect, and learning to read the AI’s intent is part of the skill. If you find that the party keeps stealing your staggers, that is a sign that you are swinging at the same moment they are, and that the cleanest fix is to time your heavy swing one beat after the ally’s opener.
The two-on-one problem
Two enemies in the same close threat band is the most dangerous situation in the game. Both will commit at overlapping times, and the second swing will land during the recovery of the first. The reliable solutions are positioning, not reflexes. Step back out of the close band so only one enemy can engage, use a party member to pin the second, or use a crowd-control ability to widen the band. The reflex-only solution, dodging both swings, is technically possible but rarely reliable for more than a few exchanges.
Stamina, posture, and the hidden economy of close threat
Below the visible combat there is an economy of stamina, posture, and a hidden value the game uses to decide who flinches first. None of these are displayed as a single number, but each one shapes the close threat band in ways that become obvious only after a few dozen fights.
Stamina: the visible cost
Stamina is the resource the game shows you. Dodging, blocking, deflecting, and swinging all cost stamina. Running out of stamina inside a close threat exchange is a near-guaranteed loss, because you cannot block, cannot dodge, and may even drop your guard. The most common stamina mistake is to spend it on a long combo that does not produce a stagger, leaving you with nothing to respond with when the enemy retaliates.
Posture: the visible crack
Posture is the visible value that appears as a crack on the character model. It rises when you are hit, when you block heavy attacks, and when you fail to deflect. A fully broken posture puts you into a long stagger and costs a large chunk of health. Posture is the reason blocking is not free: each blocked heavy attack pushes you a little closer to the break, and a defender who never deflects will eventually crack.
Poise: the hidden value
Poise is not displayed but is felt. Enemies with high poise will not flinch from a single light attack and may continue their own commit even as you hit them. This is the most counterintuitive part of the close threat band for new players, because it breaks the assumption that hitting an enemy should interrupt their attack. It does not, and acting as if it does will get you traded. The fix is to learn which enemy archetypes have high poise and to plan heavier attacks for them rather than expecting fast attacks to stagger them.
A simple decision table for the economy
| Resource state | Best defensive option | Best offensive option | Risk if you overcommit |
|---|---|---|---|
| Full stamina, low posture | Deflect the first committed swing. | Open with a light to test the read. | Low; you have room to recover. |
| Mid stamina, mid posture | Sidestep if read is uncertain. | Wait for enemy recovery, then one heavy. | Medium; a missed read will leave you exposed. |
| Low stamina, high posture | Create distance; do not block. | Disengage and reset. | High; one more hit may break posture and stagger you. |
| Empty stamina, broken posture | Sprint away; nothing else is safe. | None; survival first. | Critical; you will eat a follow-up combo. |
| The same economy applies to enemies; learning to recognise their state is half the close-range read. | |||
Enemy archetypes and how each one shapes the close threat band
Different enemy types invite different close-range behaviour, and the same band feels different against each. Recognising the archetype is often a faster read than tracking the swing itself, because the archetype tells you what kind of swing is coming next.
Grunts and fodder
Low-tier enemies have low poise, short combos, and predictable patterns. They exist to teach the band without punishing mistakes too harshly. Against grunts, the goal is to drill the deflect and the recovery punish until it is automatic. The close threat band against a grunt is the cleanest in the game, and it is the right place to experiment with a new weapon or a new combo string.
Veterans and captains
Mid-tier enemies add posture, longer combos, and at least one unblockable attack. The close threat band against a veteran is more honest: the game is no longer letting you trade freely, and it expects you to read at least one tell before swinging. Veterans are also where the party AI starts to matter, because their damage is high enough that eating two swings in a row is a real health loss.
Heavies and brutes
Heavy enemies have high poise, slow swings, and a tendency to combo into shockwaves. The close threat band against a heavy is unusually wide in time, not in space: their swings are slow enough that you have more time to read, but the recovery punish is small. The correct play against a heavy is to deflect once, accept the modest combo, and reposition; trying to extend a combo against a heavy usually trades you back to even.
Archers and ranged harassers
Ranged enemies change the band in a different way. They do not engage in close threat at all, but they force you to close the distance under pressure, which often lands you inside an ally’s close band by accident. The cleanest approach is to let the party hold the close band while you advance on the archer, then collapse the band back together once the archer is down.
Minibosses and duels
Miniboss fights are the clearest expression of the system’s design intent. They have full move sets, unique tells, and tuned posture, and they are designed to be read rather than survived. The close threat band against a miniboss is the entire fight, and the cleanest way to learn is to die a few times on purpose, watching only the tells and ignoring your own health bar. Once you can name the tells, the band opens up.
How mounts, terrain, and weather reshape close threat
Crimson For additional context, Desert is an open-world game, and the close threat band is not the same on horseback, in a narrow alley, or in a sandstorm. The system is honest about this, and the differences are large enough that ignoring them will cost you fights you would otherwise win.
Mounted combat and the close threat band
On horseback, the close threat band becomes a much larger space because the hurtbox of the horse extends your reach. Mounted swings also have a longer recovery because the horse has to reposition. The honest trade is that you can pressure a single enemy very effectively from the saddle, but a second enemy can close in and land free hits during your recovery. Mounted combat rewards picking isolated targets, not charging into groups.
Terrain: narrow streets, open fields, and the indoors
The same enemy in a wide field and in a narrow alley plays like two different games. In a wide field, you can sidestep freely and reset the band to midrange. In a narrow alley, the close threat band is the entire corridor, and there is no room for a defensive sidestep. Recognising when the terrain favours you and when it does not is a real skill, and many “unfair” encounters become fair once you learn to fight them on terrain that suits your weapon.
Weather and visibility
Sandstorms and fog reduce the visual information in the close threat band, and the game intentionally makes the audio tells more important in those conditions. The lesson is that the read does not have to be visual. In low visibility, the footwork and the vocal cues become the dominant tells, and the player who learns to use them has a real advantage in those conditions.
What practice loops actually build close threat skill
Skill in the close threat band is not built by fighting every enemy you meet. It is built by short, focused practice loops that isolate one decision. The loops below are the ones experienced players tend to use, either deliberately or by accident.
- The single-tell loop: fight a low-tier enemy and pick one tell to focus on, such as the shoulder lead or the foot plant. Ignore everything else. After a few duels, swap to a different tell and notice how the read changes.
- The deflect-only loop: fight a mid-tier enemy and commit to only deflecting, never attacking. The goal is to extend the number of consecutive deflects without breaking posture. This loop builds the timing window into muscle memory.
- The recovery-punish loop: fight a heavy and commit to attacking only during the recovery frames. The goal is to land one clean heavy per exchange, regardless of how many light swings you swing and miss.
- The no-block loop: fight a low-tier enemy and forbid yourself from blocking. Force yourself to sidestep or deflect every swing. The goal is to break the habit of holding block when uncertain.
- The party-read loop: fight a group with your full party and focus only on reading the AI’s intent. The goal is to learn which ally attacks pair well with your own opens, and which ones steal your staggers.
Each loop takes less than fifteen minutes. Together, they cover the four real decisions in the close threat band: read the tell, choose the defensive option, punish the recovery, and coordinate with the party. After a week of regular play, most players see a meaningful improvement in win rate against veterans and minibosses.
Common close threat mistakes and how to fix them
Most players fall into the same handful of traps when they start learning the close threat band. The mistakes below are not personal failures; they are predictable stages of learning the system. Recognising which mistake you are making is the fastest way to break out of it.
Mistake: holding block as a default
The habit usually starts against grunts, where block is “good enough.” It persists against veterans and heavies, where block costs more than it returns. The fix is the no-block loop above: forbid yourself from blocking for a single fight and force a different option. Within a few exchanges, the habit breaks.
Mistake: attacking into the commit
This is the most common cause of trades. The player sees an enemy winding up and instinctively swings back, because it feels productive. It is not. Attacking into a commit is the worst possible timing, because the enemy’s active frames will land during your own recovery. The fix is the recovery-punish loop: wait, then swing, every time.
Mistake: chasing the full combo string
The five- or six-hit string looks impressive in the moveset screen and feels rewarding in the moment. In the close threat band, it is usually wrong. The recovery from a long string is the longest, and an enemy with even modest poise will trade the last hit of your string with the first hit of their own. The fix is to end the string early on a read: three hits, then a guard, then a reposition. The damage loss is small; the safety gain is large.
Mistake: ignoring the party
Many fights feel stacked against the player because the player is fighting the enemy in isolation while the party is also fighting the same enemy. The enemy has effectively two close threat bands, yours and your party’s, and they will use both. The fix is to start reading the party’s intent and timing your heavy swings to land on the same opener that an ally is using, so the enemy is staggered by the party and finished by you.
Mistake: forgetting the second swing
Many enemy combos have two or three swings, and the second is the one that punishes a defender who deflects the first and then stands up. Players who deflect the first swing and then forget to track the second often eat the second swing during the recovery of their own counter. The fix is to count: every enemy combo you fight for the first time, count the swings. After a few duels, the count becomes automatic.
How the close threat band feels at higher difficulties
On higher difficulty settings, the close threat band does not change shape so much as change tempo. Enemies commit faster, recover faster, and have less downtime between combos. The defensive options do not get weaker; the windows for them get smaller. The skill that carries over from normal difficulty is the read, because a read is timing-independent. The skill that does not carry over is pure reflex, because the reflex window shrinks to a few frames.
The honest advice for higher difficulty is not to grind but to play the loops above with stricter rules. If your normal practice is “deflect what I can, sidestep what I cannot,” your higher-difficulty practice is “deflect the first two swings, then sidestep the third.” The discipline is the same; the threshold is just higher.
How the close threat band interacts with the broader open world
The open world is not just a backdrop for the combat. It is part of the system, because the design of the world determines when and how the close threat band is tested. A bandit camp on a narrow road forces a very different fight from a field encounter, even with the same enemy type. The world design is doing real work, and the player who understands that work has more options than the player who treats it as scenery.
Encounter design as a hint
Most encounter placements in the game are intentional. A camp on a ridge usually has a single approach with limited cover, which is a hint that the fight is meant to be won at range, not at close threat. A camp in a courtyard is a hint that the close threat band will be tested, because the space invites it. Players who read encounter placement often find that the “hard” fights are hard only because they are trying to win them in the wrong style.
Mounts and fast travel as tools that change the band
The game gives you tools that change the close threat band before a fight even starts. A horse lets you choose your engagement distance. A fast travel point lets you skip a long approach. These are not just convenience features; they are combat tools, and the player who uses them as combat tools will have an easier time than the player who treats them as traversal features.
Navigation and the value of the open-world map
Planning a route through contested territory is part of the close threat system, because it determines which fights you take and which you avoid. The game’s map and fast travel network are designed to give you that planning room, and reading them as combat tools rather than as travel tools is one of the small shifts that separates a struggling player from a comfortable one. The site’s own Crimson Desert map guide is a useful reference for the regional layout that shapes those decisions, particularly when planning how to approach an encounter on your own terms rather than the enemy’s.
How the close threat band is described by reviewers and the wider community
Independent reviewers have generally treated the close threat system as one of the more honest parts of the game’s design, and the critical consensus is that the combat is at its best when the player accepts the read-based loop rather than trying to brute force it. The Press Start review of the game, for example, frames the moment-to-moment combat as the strongest part of the package, which lines up with what the developer has said in interviews about designing around readable one-on-one duels. The game’s own Wikipedia entry notes the developer’s stated intent to build a system where every enemy feels like a duel, which is the design philosophy that the close threat band exists to serve.
Community discussion has generally settled on the same conclusion: the combat is deep, but it punishes impatient play, and the players who enjoy it most are the ones willing to learn the read. There is some disagreement about whether the early game is too punishing in its teaching, with some reviewers arguing that the game’s difficulty curve front-loads the close threat lessons without enough scaffolding. The honest summary is that the system is well-regarded by people who stick with it, and that the skill ceiling is high enough that there is a real difference between a casual player and a dedicated one, even at moderate difficulty.
When the close threat band is not the right frame
For all the focus on close threat, it is worth being honest that not every fight in the game is supposed to be won by reading the close range. Some encounters are designed to be resolved by crowd control, by mounted kiting, by stealth, or by abusing a terrain choke. The mistake players make when they lose to a fight is to assume they lost the close threat exchange, when in fact they were trying to win the wrong kind of fight. Recognising which fights are close-range duels and which are something else is a real meta-skill, and it is worth practising alongside the loops above.
Putting it together: a short checklist for any close threat fight
Before a fight, run through the following mental checks. They are deliberately short, because the point is to keep the read-focused discipline under pressure.
- What archetype am I fighting, and what is its expected poise and combo length?
- What is my stamina, posture, and health, and which defensive option is safe right now?
- Which tell is the dominant one for this enemy’s main swing?
- Is the terrain favouring me or the enemy, and should I reposition before engaging?
- What is my party doing, and can I time my heavy swing with theirs?
- What is my plan if my first read is wrong, and at what point will I disengage?
Six questions, ten seconds to answer, and most of the time you will find the right answer before the first swing. That is what the close threat band is really testing: not reflexes, but a sequence of small decisions made in the right order. The combat rewards the player who treats it as a system of reads, and the most consistent improvement comes from practising the reads rather than grinding the fights.
Frequently asked questions
What does “close threat” actually mean in Crimson Desert?
Close threat refers to the band of distance in which a defender has a short, readable window to react to a committed attack before the active frames land. It is not a numeric meter. The game uses the term to describe the space and timing in which a deflect, a sidestep, or a counter becomes possible, and most of the combat’s depth lives inside that band.
Is close threat the same as a threat meter in other action games?
No. Crimson Desert does not display a numeric threat value, and the combat does not behave like games with explicit posture or stance meters. Instead, threat is communicated through enemy tells such as grip changes, footwork, and shoulder leads, and through the timing of the active frames. The reads are visual and audio rather than numeric.
Should I block, deflect, or sidestep in close-range fights?
The most reliable default is “deflect what I can read, sidestep what I cannot, block only when out of position.” Blocking is safe in the moment but costs stamina and posture, sidestepping is the most positionally flexible option, and deflecting is the option that converts a read into damage. Most players find that the fights feel best when they deflect the first committed swing of an exchange and then reassess.
How does the party affect close threat fights?
Your party members occupy their own close threat bands, and enemies will switch targets when an ally is staggered or out of position. This is useful: you can lower the pressure on yourself by creating a threat elsewhere, then returning to the close range when attention has shifted. The trade is that an ally who overextends pulls more enemies into your band, and the best results come from coordinating heavy swings with the party’s openers.
Do higher difficulty settings change how the close threat band feels?
Higher difficulty settings shrink the windows rather than changing the underlying system. Enemies commit faster, recover faster, and have less downtime between combos. The reads still work, but the time you have to make each read gets smaller, which is why pure reflex tends to fall off at higher difficulty and disciplined reads get more important.
What is the fastest way to learn close threat on a new weapon?
The cleanest way is to spend ten minutes on a low-tier enemy with no goal other than to count the tells before a swing and to track which tell reliably predicts a thrust versus a sweep. Once the tells become a single pre-attack shape rather than a list, the close threat band opens up. The single-tell loop and the deflect-only loop from the practice section are both effective for this.
Why do I keep trading hits even when I swing first?
Trading hits usually means you are attacking into the enemy’s commit, not their recovery. The fix is to wait for the enemy’s swing to finish before opening with your own. The active frames of their swing are the worst possible time to attack, because their recovery comes right as you finish yours, and the enemy is now in a position to counter. Practising the recovery-punish loop is the cleanest fix.
Does mounted combat change how close threat works?
Yes. On horseback, the close threat band becomes a larger space because the horse extends your reach, and your recovery gets longer because the horse has to reposition. Mounted combat is best against single targets, because a second enemy can land free hits during your recovery. The cleanest play is to pick isolated targets from the saddle and dismount for group fights.
How is this different from the combat in other Pearl Abyss games?
Crimson Desert’s combat shares its read-based philosophy with the developer’s earlier work, including Black Desert Online’s PvP design, but it is tuned for a single-player open-world game with a strong focus on duels. The party layer, the mounted layer, and the open-world pacing are the main differences, and they shape how the close threat band feels in practice. Reviewers have generally treated the combat as one of the more honest expressions of the studio’s combat philosophy.
Where can I read more about the world layout that shapes these encounters?
The site’s own Crimson Desert map guide is a useful reference for the regional layout, fast travel points, and the terrain that shapes how each encounter can be approached. The broader combat context is also discussed in the developer’s interviews and in the Wikipedia entry for Crimson Desert, both of which frame the combat around the goal of making every enemy feel like a duel.
Leave a Reply