

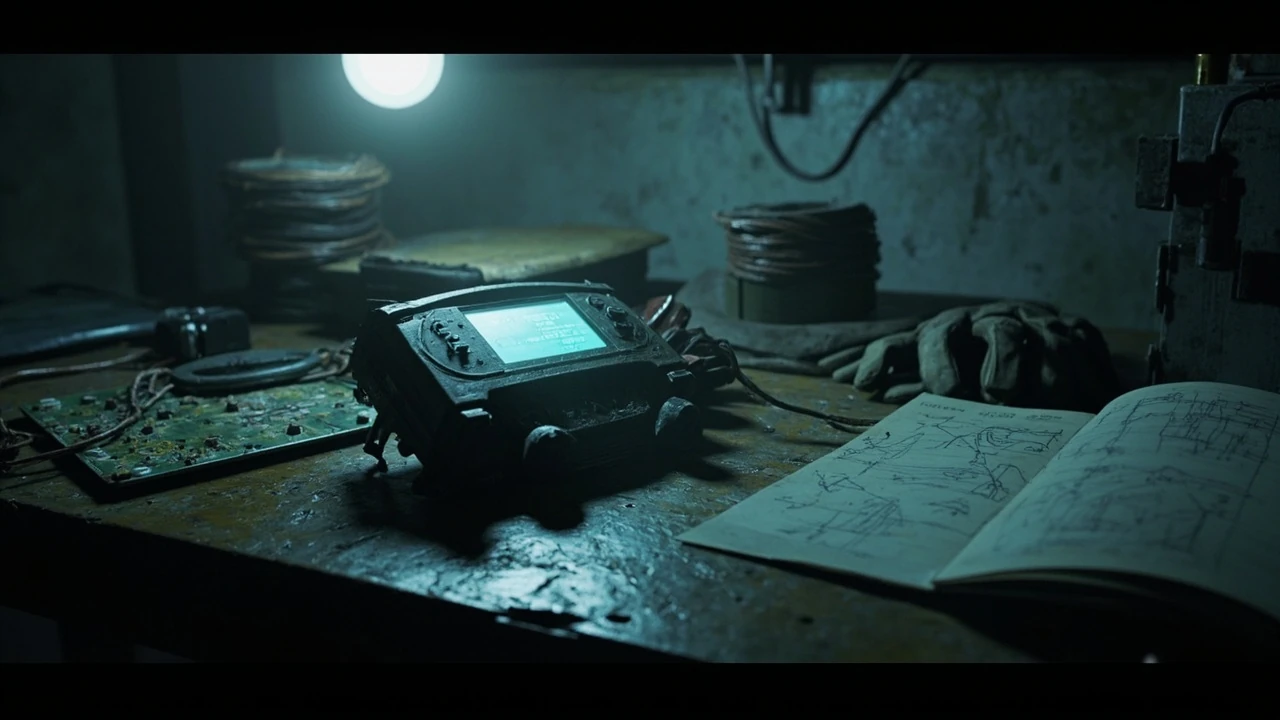

ESR analyzer in ARC Raiders: how to read, source, and use it
Extraction shooters reward players who can read a map faster than they can reload, and ARC Raiders pushes that idea further by letting every raider scan the field with portable instruments. The ESR analyzer is one of the most useful tools in that toolbox because it turns noisy environmental signals into decisions a player can act on within a single expedition. Whether the goal is locating a rare component, planning a safe route out of a contested zone, or deciding which weapon mod to prioritize at the crafting bench, the analyzer feeds the loop rather than sitting outside it. This guide explains what the tool does inside the game, how to obtain it, how to interpret its readings, and how it fits into a practical session-by-session workflow.
Because ARC Raiders is still in active development and balance changes often follow player feedback, the specifics of certain values can shift between patches. The descriptions below focus on the analyzer’s role as a design and gameplay tool: the categories of information it reveals, the kinds of decisions it supports, and the situations where it earns its inventory slot. Treat numerical thresholds as a starting point, and cross-check them with the most recent official patch notes before relying on a specific reading in a high-stakes run.
What the ESR analyzer actually is
ESR stands for the in-game designation of a portable signal analyzer built from salvaged raider tech. Mechanically, it is a handheld device that the player can deploy during an expedition to read electromagnetic and structural cues in the environment. Rather than producing a single number, the analyzer exposes a small set of categories that the player has to interpret in context: nearby mechanical activity, residual energy from recent combat, structural integrity of cover objects, and the presence of specific high-value crafting components.
The tool’s role in ARC Raiders mirrors a broader pattern in extraction shooters: portable instruments are what turn a map from a static arena into a system that responds to player behavior. The For additional context, ARC Raiders design builds on the genre’s tradition of layered scanning, and the analyzer sits alongside drones, motion sensors, and deployable beacons as one of the core ways players build situational awareness without committing to a permanent build path.
For a player, the practical consequence is simple. The analyzer does not eliminate uncertainty, but it reshapes it. Instead of guessing whether a section of a map has been picked clean, a player can get a directional reading and decide whether to spend another minute in the open. Instead of guessing whether a wall will hold against sustained fire, the player can get a warning before committing to a fight behind it. The tool rewards preparation and reading, both of which fit the deliberate pacing ARC Raiders tries to encourage in its expeditions.
How the analyzer fits the extraction shooter loop
Extraction shooters divide each session into three phases: preparation, the expedition itself, and the post-raid crafting and trading window. The ESR analyzer is interesting because it is meaningful in all three, and its value shifts depending on which phase the player is in.
- Preparation phase: the player chooses whether to bring the analyzer, decides which mode or attachment to equip, and plans routes around the kind of signal the player expects to read.
- Expedition phase: the analyzer becomes a real-time decision aid, flagging combat, component density, and cover risk in the current area.
- Post-raid phase: the data the player gathered influences which components to prioritize, which weapons or mods to craft, and which expedition to run next.
That three-phase role is why a generic “find the analyzer and press the button” explanation is not enough. The tool is most effective when the player commits to a specific reading habit before deploying, then layers the readings on top of map knowledge and squad communication rather than treating each scan in isolation.
Core readings the analyzer exposes
The analyzer presents a small, consistent set of signal categories. The names below reflect the in-game labels and the way players typically refer to them on community resources; exact wording can change with patches.
- Mechanical activity: a directional reading of nearby machines, turrets, or robotic patrols. Used to decide whether to push, hold position, or reroute.
- Combat residue: a residual reading that suggests a firefight recently took place nearby, often correlated with unlooted bodies, dropped magazines, or contested loot.
- Structural integrity: a coarse reading of whether a piece of cover is likely to remain intact under sustained fire, useful when choosing a fallback position.
- Component trace: the most valuable reading for crafters, flagging the presence of rare crafting components needed for weapon mods, armor plating, or deployables.
- Energy signature: a broad reading that surfaces powered objectives, dormant ARC units, or charged caches the player would otherwise walk past.
Each reading is shown as a tier rather than a precise number, which is by design. The tool is meant to point the player in a direction, not to replace scouting. A reading that points toward a “high” component trace is a reason to slow down and sweep the area, not a guarantee that a specific crate contains the item the player needs.
How to obtain the ESR analyzer
The analyzer is a craftable deployable rather than a permanent unlock. New players usually encounter it through one of two paths.
- Recovered from a defeated raider or supply cache: the schematic often appears as a rare drop in mid- and late-game expeditions, especially in zones that attract squad activity.
- Crafted at a workbench: once the schematic is known, the analyzer is assembled from common mechanical parts plus a smaller number of rare components. The exact recipe changes between patches, so the recipe below should be treated as a baseline.
A typical mid-game recipe requires a small set of standard parts plus a couple of rarer ingredients:
- Scrap wiring, used as the base conductive material.
- A salvaged sensor array, often pulled from a downed ARC unit.
- One or more refined alloys drawn from refinery output.
- A small amount of energy cell charge, which limits how many analyzers the player can carry per expedition.
Because the analyzer consumes energy on use, the player has to balance how many they bring into a session. Bringing two is rarely wasteful on a long expedition; bringing four starts to crowd out medical supplies and ammo. Most experienced players settle on one or two analyzers paired with a small stock of consumable scans.
Reading the signal during a run
The on-screen interface is intentionally compact. Players who try to memorize every icon at once usually miss the most important cue: direction. The analyzer is not a map, and the developers have resisted adding an arrow that points at the nearest item. Instead, the device exposes a sector and a tier, and the player is expected to translate that into a decision with the rest of the squad.
A reliable way to read a signal is to anchor it to a familiar landmark. Before deploying the analyzer, the player notes a building, ridge, or container stack in the current area. When the result comes back, the player orients toward the landmark and treats the reading as a relative direction, not an absolute one. That habit reduces the most common mistake: spinning in place while trying to interpret a signal and exposing the player to fire from a flank.
Squad play makes the analyzer more useful. In a three-player group, one player deploys and reads, a second covers the deployment, and the third holds the escape route. Splitting those roles keeps the scanner alive long enough to get a second reading, which is often where the real value appears: a faint first reading that becomes a strong second reading once the player moves ten or fifteen meters in the suggested direction.
Decision patterns the analyzer supports
The tool is most useful when it is tied to a specific decision the player is about to make. The patterns below reflect how experienced players tend to use it during a run.
| Decision | Reading to watch | How the analyzer informs the call |
|---|---|---|
| Push or hold a contested position | Mechanical activity | A high reading warns that robotic patrols are about to respawn, pushing the player to extract before the next cycle rather than dig in. |
| Spend time looting a structure | Component trace | A medium or high trace suggests the structure still holds rare crafting parts, justifying a slow clear rather than a fast sweep. |
| Use a wall as cover | Structural integrity | A low reading warns the cover will fail under sustained fire, suggesting a move to a more durable position before engaging. |
| Approach a recently active firefight | Combat residue | A strong reading suggests unlooted bodies and dropped kits, rewarding a cautious approach with high-value salvage. |
| Investigate a powered object or cache | Energy signature | A persistent reading hints at a charged cache, dormant ARC unit, or objective that other players tend to skip. |
| Extract now or stay for one more objective | Combined readings | Stacked high readings from multiple categories often indicate a third-party squad is rotating in, favoring extraction. |
Players who treat the analyzer as a single-purpose item usually underuse it. The tool shines when the player is willing to ask a different question on each scan rather than the same one, and when the player is prepared to act on the answer even when it means abandoning a planned route.
Common mistakes when using the analyzer
New players tend to fall into a small set of habits that reduce the analyzer’s value. Avoiding these is usually a faster path to better outcomes than chasing new components.
- Scanning in the open: deploying while standing in a doorway or on a rooftop makes the scan easy to read for any nearby observer. The brief animation is loud enough to give away position.
- Trusting a single reading: a high reading can reflect a single object, not a cluster. Move a short distance and rescan before committing to a plan.
- Ignoring the energy cell cost: the analyzer draws from a finite pool, and a depleted device mid-expedition is wasted inventory weight.
- Using the analyzer as a replacement for scouting: the tool is a complement to sight lines and sound cues, not a substitute. A silent approach still beats a loud scan.
- Reading in the wrong context: a structural integrity reading in a freshly built cover behaves differently from the same reading in a damaged ruin. Local context changes what the result means.
A useful self-check after a failed run is to ask whether the analyzer contributed to the decision that went wrong. If the tool was sitting in the inventory unused, the issue is usually deployment timing rather than the analyzer itself.
How the analyzer ties into crafting
Crafting in ARC Raiders is gated by components, and the most frustrating experience for a new player is running three expeditions in a row and coming back with none of the parts needed for the next weapon mod. The analyzer shortens that loop by reducing the wasted time spent searching empty rooms.
The relationship is not direct. A component trace reading does not name a specific item. Instead, it points the player toward areas where rare parts are more likely to appear, which is most useful in two situations:
- The player is chasing a specific mod and has a short window to decide which expedition to run next.
- The player is doing a focused farming run for a particular component and wants to avoid spending time in zones that are unlikely to drop it.
For long-term progression, pairing the analyzer with a small personal log of which zones tend to surface which components is a powerful habit. The game does not provide this log for the player, but a short note between sessions compounds quickly. After a few expeditions, the player starts to see patterns that the analyzer reinforces rather than invents.
Loadout and inventory planning
The analyzer is a deployable, which means it competes with healing items, ammo packs, and other tools for limited slots. The decision of whether to bring it depends on the expedition type, the squad role, and the expected length of the run.
| Expedition type | Recommended analyzer count | Reason |
|---|---|---|
| Short, fast loot run | 0 to 1 | Limited time on the field reduces the value of a slow scanning tool. Bring one only if the player expects a high component density. |
| Standard squad run | 1 to 2 | One scanner and one backup is the most common loadout. Allows a second scan after repositioning without returning to base. |
| Long, objective-driven run | 2 to 3 | Multiple objectives and contested zones make repeated scans valuable. Bring a third only if energy cell supply supports it. |
| Solo stealth or sniper run | 0 to 1 | Silent play and the analyzer’s deployment animation work against each other. Bring one only for the final objective. |
For players who run in a regular squad, the loadout question is often a group decision. One player running the analyzer while the other two run heavier combat gear tends to give the squad better information without sacrificing firepower.
Reading the analyzer alongside other tools
The ESR analyzer is most useful when the player combines it with the other instruments available in the game. A short summary of how the major tools interact:
- Drone: provides long-range, persistent observation of a fixed area. The analyzer adds the ability to read the same area at a specific moment, which is useful for confirming that a drone contact is real rather than a glitch.
- Motion sensor: flags movement within a radius. The analyzer adds direction and category, so the player can tell whether the movement is a patrol, another squad, or an environmental effect.
- Deployable beacon: marks an extraction or rally point. The analyzer does not replace the beacon, but it can confirm that a marked route is still clear before the player commits to it.
- Map intel: provides static information about the zone. The analyzer is the dynamic layer on top of that static information, and treating them as separate is a common mistake.
Used together, these tools form a feedback loop. The drone spots contact, the motion sensor confirms movement, and the analyzer reads what the contact is doing. The player then decides whether to push, hold, or extract based on the combined picture.
Solo play versus squad play
The analyzer’s role changes noticeably between solo and squad play, and players who switch modes often need to relearn their habits.
Solo players benefit most from the analyzer’s component trace and structural integrity readings. Those two categories support the solo player’s two main decisions: where to spend the next minute, and whether a piece of cover is safe enough to commit to. The downside is exposure: a solo player has no second pair of eyes to cover the deployment animation, so the analyzer’s value is partly offset by the time it takes to read the result.
Squad players benefit most from mechanical activity and energy signature readings, both of which help coordinate a three-person push. A squad that rotates based on the analyzer’s reading tends to move as a unit rather than as three individuals, which is one of the strongest predictors of success in extraction play. The cost is that three players all trying to read at once wastes a finite energy supply, which is why assigning a single scanner is the dominant squad pattern.
A separate but related habit is voice discipline. Calling out a reading is most useful when the caller adds a short interpretation, not just a number. “Strong component trace, northwest, ten meters past the containers” is more useful than “northwest high.” The analyzer produces data, and the squad’s job is to convert that data into an action.
How the analyzer affects risk and reward
Every tool in ARC Raiders is a trade between risk and reward, and the ESR analyzer is no exception. The tool increases the reward side of the trade by pointing the player toward high-value areas, but it also increases the risk side by giving away position and consuming finite resources.
A useful mental model is to score each deployment on three questions before pressing the button:
- Does the answer to this scan change a decision I am about to make?
- Can I afford the time and energy cost of this scan in the current situation?
- Am I in a position where the deployment animation will not get me killed?
If any of those three answers is no, the scan is probably a mistake. This is a strict rule, and following it strictly will leave the player with a smaller number of scans per run, but each scan will be the one that mattered.
Patch sensitivity and the long-term view
Because ARC Raiders is in active development, specific readings, recipes, and tiers can shift between patches. Players who treat the analyzer as a static tool will eventually find their habits misaligned with the current build. The strongest long-term approach is to focus on the categories of information the tool exposes, not the exact numbers. As long as the analyzer continues to read mechanical activity, combat residue, structural integrity, component traces, and energy signatures, the underlying decision logic described above remains valid.
External coverage from outlets like the Game Informer preview of ARC Raiders emphasizes the developer’s focus on layered tools and player-driven pacing, which suggests that portable instruments like the analyzer will continue to be a meaningful part of the design rather than a one-off feature.
Building a personal scan routine
Players who get the most out of the analyzer tend to develop a small, repeatable routine that fits the way they already play. A few examples that work well in practice:
- Scan on arrival: the first thirty seconds after dropping into a new area are the safest time to scan. Use that window to confirm the area is worth the time the player just spent getting there.
- Scan before a fight: a quick structural integrity scan on the cover the player is about to use often prevents a bad commitment. The cost is low and the upside is real.
- Scan on extract: a final mechanical activity and energy signature scan before heading to the extraction point reduces the chance of walking into a third-party squad.
- Scan when repositioning: the moment of moving from one piece of cover to another is a natural scan point, because the player is already in motion and a short stop is less conspicuous.
The right routine depends on the player’s style, and copying a streamer’s routine without adapting it usually produces worse results. The point of a routine is to make the analyzer a reflex rather than a decision, which is what separates experienced players from new ones.
When not to use the analyzer
The tool is not always the right choice, and recognizing those moments is part of using it well.
- Early in a run with a long route ahead: the energy cost is best spent on a decisive moment rather than a routine habit.
- Inside a contested loot room: a scan in a small, enclosed space is more likely to attract attention than produce useful information.
- When the squad is already engaged: the brief delay of a scan can break the flow of an active firefight. A scan after the engagement is more valuable.
- When the player is about to extract: scanning at the extraction point tells other players exactly where the player is, and the information rarely justifies the exposure.
A useful internal rule is to treat the analyzer as a planning tool more than a reaction tool. The information it provides is most valuable before the player commits to a route, not after.
Practical examples from real expedition patterns
A few short scenarios illustrate how the readings combine in actual play.
Scenario one: a solo player drops into a mid-tier zone with a goal of farming a specific armor mod. The first scan returns a medium component trace to the east, which matches the player’s prior log of a container stack in that direction. The player moves there, clears the area, and recovers two of the needed components in under two minutes. The scan paid for itself.
Scenario two: a three-player squad is pushing an objective. The scanner reads a high mechanical activity reading to the south, which a second player confirms with a drone. The squad reroutes north, completes the objective, and extracts without engaging the patrol. Without the scan, the squad would have walked into the patrol and either fought or extracted empty.
Scenario three: a duo is holding a defensive position behind a low wall. The scanner reads a low structural integrity on the wall. The squad moves to a more durable position a few meters back, and the original wall collapses under sustained enemy fire a few seconds later. The scan cost one deployment and saved a wipe.
These examples are not guaranteed outcomes. The analyzer reduces uncertainty, but it does not eliminate it. The tool is most useful when the player is willing to act on imperfect information rather than wait for certainty that never arrives.
Common community questions and clarifications
A few recurring points are worth addressing directly because they shape how the tool is used.
- The analyzer is not a wallhack. It does not reveal enemy players through solid objects, and the developers have not signaled any plan to add that capability.
- The tool is deployable, not permanent. Carrying a charged analyzer in the inventory does not provide passive information, which is a common misconception among new players.
- Energy cells used by the analyzer are not shared with weapons, healing items, or deployables. Running out of analyzer charge does not mean running out of healing.
- The analyzer is not class-locked in the current build. Any player can craft and use it, which is one of the reasons it appears in most squad compositions.
These clarifications do not change the analyzer’s role in the loop, but they do change how the player plans inventory and squad roles.
Putting it all together
The ESR analyzer is a small, focused tool that rewards players who use it deliberately. It does not replace map knowledge, squad coordination, or mechanical skill, and it does not hand the player free wins. What it does is reduce the time between question and answer in a genre where a few seconds often decide an entire expedition. Used well, it becomes one of the most consistent ways to convert preparation into reward, and it fits naturally into both solo and squad play.
The practical next step for a new player is small. Pick one of the routines above, run two expeditions with it, and notice whether the analyzer contributed to a decision the player would otherwise have made on guesswork. If it did, the tool is earning its slot. If it did not, the player probably needs to narrow the question being asked of the scan, not the scanner itself.
Frequently asked questions
What does ESR stand for in ARC Raiders?
ESR is the in-game designation for a portable signal analyzer that reads electromagnetic and structural cues in the environment. The acronym is used consistently across crafting menus, deployable descriptions, and squad callouts, and it has not been officially expanded by the developers as of recent patches. The acronym functions more as a category label than a literal scientific term, which is why the tool behaves like a generalized scanner rather than a single-purpose detector.
Is the ESR analyzer craftable, and what does it need?
Yes, the analyzer is a craftable deployable. The typical mid-game recipe includes scrap wiring, a salvaged sensor array, refined alloys, and a small amount of energy cell charge. The exact component list and quantities can change between patches, so the most reliable source for current values is the in-game workbench description and the latest official patch notes.
How many analyzers should I bring per run?
Most players bring one or two analyzers on a standard expedition. Short loot runs usually need only one, while long objective-driven runs can justify two or three if energy cell supply supports it. Bringing more than three analyzers is rarely worth the inventory cost, because the marginal value of a fourth or fifth scan in a single run is low.
Does the analyzer reveal enemy players?
No, the analyzer does not reveal enemy players through solid objects. The mechanical activity reading surfaces robotic patrols and machines, not human-controlled raiders. Detecting other players still relies on sight lines, sound, drones, and motion sensors, and the analyzer is a complement to those tools rather than a replacement.
Can I share analyzer readings with my squad?
Yes, the most effective squad use is to assign one player as the dedicated scanner and call out the readings over voice. The scanner’s job is to read, interpret, and announce, while the other players cover the deployment animation and act on the result. A single scanner for a three-player squad is the dominant pattern, because it avoids wasting finite energy on overlapping scans.
Does the analyzer use energy cells, and what happens when it runs out?
The analyzer draws from its own energy cell, separate from weapons, healing items, and other deployables. When the cell is depleted, the analyzer becomes inert until the player returns to a base and recharges it. Running out of analyzer charge does not affect the rest of the inventory, which is why the tool is considered a low-risk deployable to bring along.
Is the analyzer useful in solo play?
Yes, but with a different emphasis. Solo players benefit most from the component trace and structural integrity readings, which support the two main solo decisions: where to spend time and whether cover is safe. The downside is exposure during the deployment animation, so solo players tend to scan less often and choose moments when they are already in cover.
Does the analyzer work on every map?
Yes, the analyzer functions on every playable map, and the categories of reading are consistent across zones. The way the player interprets the readings changes with the map, because some zones have denser component spawns and others have more active patrols. A short personal log of which zones tend to surface which readings is the most reliable way to build map-specific knowledge over time.
What is the difference between the analyzer and a drone?
The drone provides long-range, persistent observation of a fixed area, while the analyzer provides a single, immediate reading of a specific location. The two tools complement each other: the drone confirms that there is something to look at, and the analyzer tells the player what that something is. Most experienced squads use both within a single expedition, switching between them based on the situation.
Will the analyzer change with future patches?
Specific values, recipes, and possibly even reading categories can change as ARC Raiders continues to develop. The most reliable long-term approach is to focus on the categories of information the tool exposes rather than exact numbers. The decision logic that connects a reading to an action tends to survive patches, even when the underlying values shift.
Leave a Reply