

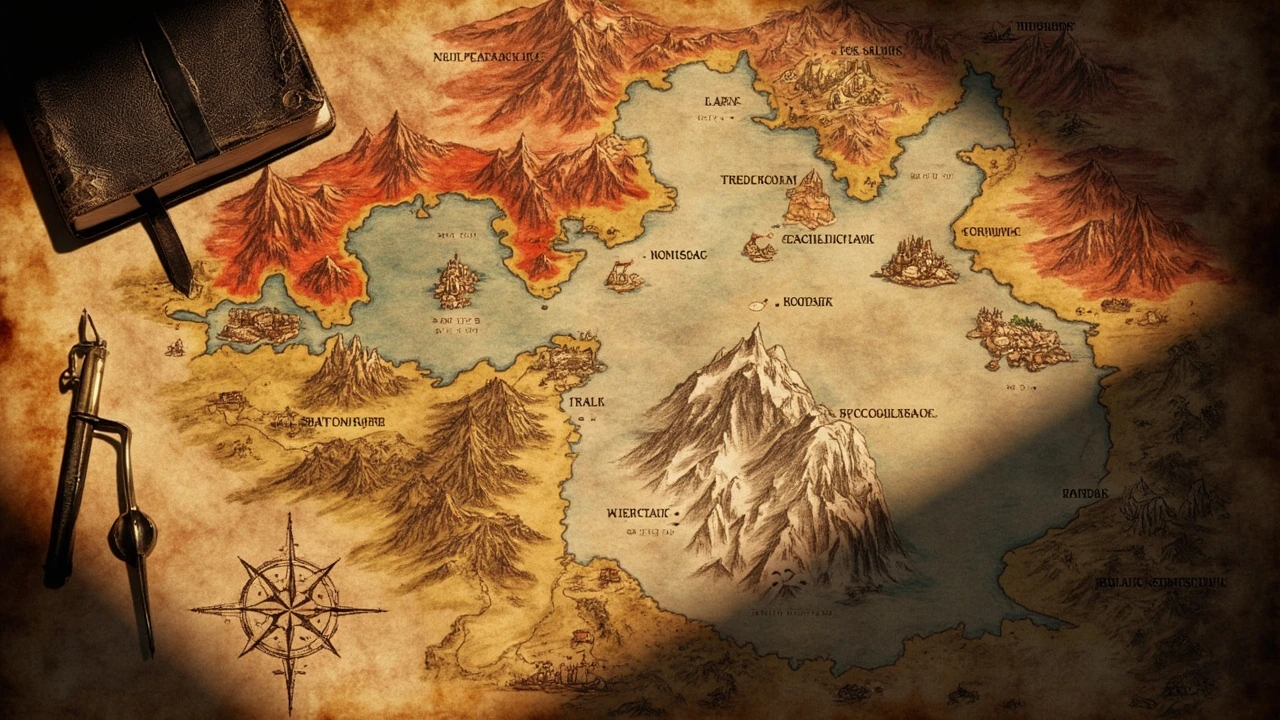

Crimson Desert map: regions, fast travel, and navigation guide
Exploring Pailwal on foot is the slowest way to learn its geography, and it is also the most punishing. The continent that hosts Crimson Desert is built around large, hostile distances, and the in-game cartography is intentionally fragmented so that players piece routes together from waystones, campfires, and overheard dialogue rather than reading one unlocked chart. The practical result is that anyone who treats the world as a single connected Crimson Desert map will spend more time riding between objectives than actually playing through them. Anyone who treats it as a layered set of regional maps, each with its own landmarks and traversal rules, will plan routes, manage stamina, and unlock travel points far more efficiently.
This guide breaks the world into the regions the developer has publicly described, explains how the in-game mapping tool behaves, lists the categories of landmarks worth memorising, and shows how to combine those landmarks into a usable route plan. It is written for a player who already understands action RPG combat and basic open-world traversal and wants to make better decisions before every ride. It is also written for a developer or level designer who wants to study how a single contiguous space is presented to the player through progressive disclosure of geography.
How the Crimson Desert map is presented in-game
When you first enter the open world, the mapping tool does not give you a complete view of the continent. Instead, it shows a faded parchment with a small revealed radius around your current position. As you ride, fight, and rest, additional tiles fill in based on the height of nearby ridgelines, the reach of line-of-sight from elevated terrain, and the proximity of certain named landmarks. The intent, described publicly by Pearl Abyss during pre-release previews, is to make exploration itself the cartographer: discovery is a reward, not a setting the player toggles on.
The revealed tiles persist between sessions, so the practical workflow is to plan rides around high ground that will reveal a large surrounding radius, then descend into valleys only after the surrounding shape is known. Players who try to chart a long east-west route through low ground will end up with a thin, broken line on their sheet and will have to repeat the same ride at higher altitude to understand what the path was actually doing. The same rule applies in reverse for coastlines: the shoreline will read clearly from a headland, but the caves and sea stacks beneath it stay blank until you walk the beach itself.
What the in-game cartography tracks
The mapping tool records more than a flat surface. Each revealed tile carries metadata that the rest of the interface can read, which is why a waystone visible on the map will also appear as a fast travel option in the menu, and why a discovered cave icon triggers a separate sub-map when you enter it. The categories that the tool tracks include the following.
- Region boundaries: the broad biome areas described in the next section, drawn from coastline to coastline.
- Named landmarks: settlements, forts, ruins, mines, and large natural features such as the central salt lake.
- Fast travel points: waystones, certain campfire clusters, and settlement gates that satisfy the menu’s travel rules.
- Side content markers: bandit camps, elite creature territories, escort NPCs, and timed event sites.
- Player-placed markers: personal waypoints, group waypoints, and custom route lines that can be shared with other players on the same shard.
Understanding the difference between a system-tracked marker and a personal marker matters because personal markers do not unlock fast travel. Placing a custom pin on a waystone does not give you a teleport target, only a reminder of where one already exists. The same distinction applies to the quest layer: a quest objective is drawn on top of the base chart, but it does not change which tiles are revealed when you stand on a ridge.
The major regions on the continent
Pearl Abyss has grouped Pailwal into a small number of large regions, each defined by a dominant biome and a recurring traversal challenge. Treat these as the spine of any route plan, because the elevation, climate, and enemy density inside one region are usually consistent enough that a single riding strategy can carry you through it. The borders between regions are not always visible on the sheet itself; most players learn them from the change in ambient colour, the appearance of a new waystone, and the shift in weather effects such as sandstorms or snowfall.
| Region | Dominant biome | Typical traversal challenge | Notable landmarks |
|---|---|---|---|
| Red Wastes | Open sand and red rock plateaus | Heat, scarce water, long sight lines that hide ambushes | Central salt lake, scattered caravan camps |
| Greymire Highlands | Rolling hills, scrub forest, river valleys | Wet footing, river crossings, bandit outposts in folds | Trading town, fortified bridge, logging camps |
| Crimson Coast | Cliffs, sea stacks, narrow beaches | Vertical drops, tidal caves, narrow causeways | Fishing villages, lighthouse ruin, sunken shrine |
| Northwatch Reach | Snowfields, pine forest, frozen river | Cold, reduced mount stamina, ice on slopes | Fortress town, ice cave system, supply depot |
| Blackridge Mountains | Vertical ridges, deep canyons | Climbing, high winds, limited road network | Hermit monastery, mountain shrine, mining town |
The exact names, borders, and landmark counts shift between developer updates, so treat the table as a way to reason about categories of terrain rather than as a literal index. What does not change is the underlying design: each region is a closed circuit of roads, off-road shortcuts, and one or two main arterial routes, and a player who learns that circuit can move through it without referring to the in-game sheet at all. A useful habit is to learn one full circuit per region and write down the road forks in order; that list will outlast several patches of name changes.
Fast travel and how the waystone network actually works
For additional context, Fast travel in Crimson Desert is conditional, not universal. The menu will only offer a destination if a waystone at that location has been activated, if the location satisfies a safe check, and if the player is not currently carrying a quest item flagged as too dangerous to teleport with. The safe check is what most players notice first, because a waystone in a hostile camp will not appear in the travel list even after it has been lit. The same is true for a waystone that sits near a siege marker or a timed event; the menu hides it until the surrounding threat has been resolved.
Waystones are placed near settlements, at major road forks, and on the edge of each region’s transition zone. The intent is to create a network of safe hubs that players can chain together for long journeys, while still forcing them to ride the final stretch into a contested area on foot or on horseback. When the network is intact, you can move across two regions in a fraction of the time it would take to ride the entire distance, which is why the early game feels slow and the late game feels fast in a way that is not about character level.
Activating and chaining waystones
Activating a waystone is straightforward, but a few rules determine which stones become useful and which stay decorative.
- Discover the stone by riding within interaction range, then hold the activation input until the cutscene finishes. Interrupting the animation can leave the stone inert until you rest.
- Make sure the surrounding area is clear. Stones placed inside bandit camps will not register as fast travel points even after activation, so look for the ones that sit on the road just outside a contested zone.
- Pair stones with the nearest campfire cluster. A waystone without a nearby safe rest point is still useful for routing, but the next leg of the journey usually starts at a campfire, not at the stone itself.
- Use region transition stones to chain long rides. The developer places a waystone near every biome border, which makes them the natural joints of any multi-region route.
- Check the stone after every storm or siege event. Some scripted encounters will flip a waystone back to inactive, and the only way to find out is to open the travel menu before you commit to a long ride.
A practical rule of thumb is that two activated waystones in the same region are usually enough to cover that region, because most quests send you back to a hub rather than into a second corner. Once you have the hub stone and a transition stone, you can answer the vast majority of the region’s contract board with only short detours. The remaining detours are usually faster on foot from a hub than they would be from a second waystone, which is why the network is denser at the borders and thinner in the middle of each region.
Landmarks to memorise before planning a long ride
Every region contains a small set of landmarks that act as orientation anchors. Memorising their relative position is faster than reading the map mid-ride, especially on console where the in-game sheet is slow to consult. The landmarks fall into four practical categories, and each category answers a different question that a rider will ask during a session.
| Category | Why it matters | Example | How to use it on the ride |
|---|---|---|---|
| Hub settlement | Inn, vendor, contract board, rest point | The trading town in Greymire | Set as a waypoint at the start of any long chain of side quests |
| Region transition | Biome border, often with a waystone | The pass between Red Wastes and Blackridge | Use as a checkpoint when chaining regions |
| High ground overlook | Reveals a wide radius of map tiles | Plateau edges above the salt lake | Climb before descending into valleys to fill the sheet |
| Danger zone anchor | Named elite territory or ambush site | Bandit fortress in the southern canyon | Use as a visual reference for the route around the contested area |
The high ground overlook is the one most players overlook. Climbing a known overlook at the start of a session is the fastest way to fill several tiles of the Crimson Desert map without committing to a specific quest, and it doubles as a defensive position if the climb itself draws aggression from below. The danger zone anchor is the one most players under-use: once a bandit fortress or an elite territory is on the sheet, it is much easier to plan a route around it than to remember, mid-combat, that the canyon to the south is held by a named enemy.
Planning a route across multiple regions
A long ride across Pailwal is not a single decision. It is a chain of small decisions, and the chain breaks if any single leg is wrong. The workflow below keeps the chain intact from the moment you leave a hub to the moment you arrive at the next safe rest.
- Pick the destination region and the safest transition stone on its border.
- From the current hub, activate the nearest waystone and ride directly to the next region’s transition stone, avoiding marked danger zones.
- At the transition stone, rest, repair, and resupply before continuing, because the next leg will often cross hostile ground with no merchants in reach.
- Use the transition stone to fast travel back to the previous hub if the next quest requires setup, then repeat the chain.
- Mark any newly discovered waystone as a personal pin so you can return to it without re-reading the map.
- Note the time of day at the transition stone. Several bandit patrols change shift at dusk, and a leg that is safe at noon can be contested at night.
The fifth step looks small, but it is the difference between a session spent planning and a session spent playing. A handful of well-chosen personal pins, placed at every waystone you have activated, turns the in-game sheet from a navigation tool into a planning tool, because the planning is already done the next time you open it. The sixth step is the one that experienced riders add after a few deaths in the wrong canyon; it is worth absorbing early.
Sample multi-region route
Suppose the goal is to reach a fortress town in the Northwatch Reach from a starting hub in the Greymire Highlands. A direct ride is possible, but it crosses two climate zones and several bandit territories, and the cold at the destination will drain mount stamina if the ride is too long. A safer chain would look like the sequence below.
- Hub stone in Greymire to the Greymire Highlands transition stone at the western pass.
- Transition stone to the Blackridge waystone at the base of the cliffs, then ride up the eastern switchback to the Blackridge transition stone.
- Transition stone to the Northwatch Reach waystone in the foothills, then ride to the fortress town gate.
- Rest at the fortress inn, then set personal pins at the three transition stones used on the way in for the return trip.
- On the return, fast travel from the Northwatch waystone to the Blackridge transition stone, ride down to the Greymire waystone, and fast travel back to the hub stone to skip the climb.
Each leg is short enough that mount stamina recovers at the next campfire, and each transition stone doubles as a teleport target for the return journey. The total time is dominated by the rides between transition stones rather than by the long, dangerous direct crossing. The fifth step matters because the climb back up the Blackridge switchback is harder than the descent, and reversing it on foot is the most common cause of a dead mount in cold weather.
What the open world gets right and where it strains
From a design perspective, the choice to fragment the cartography is consistent with the rest of the systems. Combat, traversal, and quest pacing all reward preparation over reaction, and a map that fills in as you explore reinforces that loop. The reveal radius tied to height of sight is the strongest single decision, because it means that the player’s choice of route is also the player’s choice of how much of the world they understand at any moment. A For additional context, long review of the launch build published in March 2026 describes the same loop in plainer language, noting that the world rewards players who treat the cartography as a journal rather than a checklist.
The approach strains in two predictable places. The first is backtracking for side content. When a contract board is full and the destinations are scattered across two regions, the player is forced to chain rides that the in-game sheet does not really help with, because the contracts do not have a plan route overlay. The second is multiplayer coordination, where the personal pin system does not extend to fast travel; one player cannot grant another access to an activated waystone, so group rides have to start from a shared hub rather than from a pin. A third, smaller strain is the lack of a distance overlay: the sheet shows the shape of the world but not the time cost between two points, which is the piece of information riders actually need when they plan a long chain.
None of these issues is a bug, and none forces a redesign. They are the predictable cost of a world that is designed to be read slowly. A player who accepts that pacing will plan a session around two or three objectives, ride with intention, and treat the in-game sheet as a journal rather than a dashboard. A player who fights the pacing will spend the same evening doing three short rides and one long, frustrating one, and will conclude that the cartography is broken when it is in fact working as designed.
How a developer or level designer can read the world
For a developer reading this as a case study, the most useful detail is how the player’s mental model of the Crimson Desert map is built. It is not built from a single reveal. It is built from the repeated exposure of a small number of landmarks, each tied to a specific system, so that the player learns the geography by learning the systems that live on top of it. Waystones teach the network. Settlements teach the hubs. Overlooks teach the silhouette. Bandit camps teach the boundaries of contested space. Each landmark type answers one question, and the player’s mental map is the sum of those answers.
A level designer working on a similar open world can borrow the trick directly. Rather than handing the player a full chart, place a small set of landmarks that each carry one piece of system information, then make sure the player’s route forces them to combine those landmarks into a coherent mental map. The result is a world that feels discovered rather than delivered, even when the underlying tile data is fixed. The trick scales poorly if the landmarks are not spaced: too many anchors in one valley teach the valley well but leave the next region blank, which produces exactly the broken strips of chart that low-ground riding produces in Crimson Desert.
The trap to avoid is overusing the reveal radius. If every cliff and rooftop reveals a huge amount of geography, the player’s mental map fills too quickly and the loop loses its rhythm. Keep the radius modest, reserve the wide reveals for a small number of named overlooks, and make the player climb to those overlooks as a deliberate action rather than as a side effect of normal traversal. The same caution applies to quest markers: if every quest hand-holds the player to the next step, the cartography stops carrying information and the player stops reading it.
Working with the map in multiplayer and group play
Multiplayer in Crimson Desert is shard-based, and a shard has its own activated waystone list. A waystone you light on one shard does not unlock on another, which means that the first task for a new group is always to compare maps and identify which of the hub stones the group has already activated. The fastest way to do that is to open the personal pin list at a campfire and look for pins placed near named transition stones. The list is not sorted by region, so a useful habit is to prefix every personal pin with the region code before placing it.
Group rides benefit from the same chain workflow that solo rides do, but with one extra rule: agree on the next transition stone before leaving the current hub. Players who ride ahead to scout usually end up triggering combat that the rest of the group is not positioned for, and the waystone at the end of that ride may not register as a fast travel point if the surrounding area is hostile when the group arrives. A related rule is to choose a hub stone as the rally point after any major fight; the party that scatters across the chart will spend the next ten minutes regrouping, and the waystone list will not help them do it quickly.
Common mistakes when reading the map
Most of the friction players report with cartography in Crimson Desert comes from a small set of recurring mistakes. The list below is drawn from public discussion of the pre-release betas and the launch period and is worth reading once before committing to a long route.
- Treating personal pins as fast travel targets. They are reminders, not teleport anchors.
- Riding low ground first. Low ground reveals thin strips of the map and forces repeated revisits from higher elevation.
- Ignoring the safe check on waystones. A lit waystone inside a bandit camp will not appear in the travel menu until the camp is cleared.
- Planning across more than two regions in a single session. The combined cold, heat, and stamina drain across three biomes is the most common cause of a dead mount and a soft lock on a long ride.
- Skipping the campfire before a transition. The next region often has no merchants in range, and the transition stone is the last reliable rest point for the next leg.
- Confusing the quest layer with the base chart. Toggling the quest layer off will hide markers but not revealed tiles, and vice versa.
Avoiding these mistakes will not change the pacing of the world, but it will keep the pacing from turning into a grind. The point of the system is to slow the player down enough to read the space, not to slow them down for its own sake, and the mistakes above are usually the cases where a player tries to outrun that pacing rather than work with it.
When the map is not the right tool
There are situations in which reading the in-game sheet is the slowest way to make progress. The first is dense, vertical terrain such as the Blackridge canyons, where the map shows the horizontal layout but hides the elevation of the routes between landmarks. The second is timed content, where the objective moves faster than the player can reorient the sheet. The third is stealth, where the marker for an enemy camp is helpful for entry planning but misleading for the path through the camp itself. The fourth is weather: a sandstorm or a snow squall will close the sheet visually for several seconds, and trying to read it through the haze is slower than waiting the storm out under a cliff.
In each of these cases, the right move is to ignore the in-game sheet and rely on the immediate environment. The system gives the player enough landmarks that a careful walk, with the sheet closed, will usually produce a more useful mental map than a frantic series of marker placements. Returning to the sheet afterwards, from a campfire, will then fill in the surrounding tiles far more cheaply than trying to do both at once. The rule generalises: the in-game sheet is a planning tool, and a planning tool is most useful when the player is not in the middle of the situation it plans for.
Frequently asked questions
How big is the Crimson Desert map compared with other open worlds?
Public developer statements describe Pailwal as a single contiguous landmass of roughly forty square kilometres of traversable terrain, which is smaller than several flagship open worlds on the market but is dense with vertical layering and interior cells. The size becomes meaningful only when combined with the waystone network, because the network is what turns the landmass into a route system.
Does Crimson Desert have a full map from the start?
No. The mapping tool begins with a small radius around the player’s position and reveals more as the player rides, climbs, and rests. The reveal is persistent, so the chart fills in over the course of normal play rather than unlocking all at once.
Can you fast travel from anywhere on the map?
Fast travel is restricted to activated waystones in safe areas. Waystones inside hostile zones, or waystones near a quest item flagged as unsafe to carry, will not appear in the travel menu until the condition is resolved.
Are there separate maps for caves and interiors?
Yes. Interior cells such as caves, mines, and ruins have their own sub-maps that load when the player enters and disappear when the player leaves. They do not overwrite the overworld chart, but they do not contribute to its reveal radius either.
How do player markers and group markers work?
Players can place personal waypoints anywhere on the revealed chart, and party members on the same shard can see a subset of those markers. Personal markers do not grant fast travel, and they do not persist across shards, so a group ride has to start from a shared hub rather than from a personal pin.
What is the fastest way to reveal a large area of the map?
Climb to a known overlook. The reveal radius is tied to height of sight, so a single climb on a tall ridge will fill more tiles than several hours of riding through the valleys below. The high ground overlooks are the most efficient way to chart a new region at the start of a session.
Do quest markers appear directly on the open world sheet?
Quest objectives are layered on top of the base chart rather than being written into it. Turning the quest layer off will hide the markers without losing the revealed tiles, which is useful when the player wants to read the geography without the visual noise of active contracts.
Does the map change during the campaign or with patches?
Some patches add new landmarks and rebalance the waystone network, and a small number of timed events temporarily change access to certain regions. The base chart is otherwise stable, so a careful player can plan around landmarks they have already learned without having to relearn the world from scratch after each update.
Can weather or time of day change what the map shows?
Weather does not change the tiles themselves, but heavy sandstorms, snow, and fog will obscure the sheet visually and force the player to rely on landmarks. Time of day does not change the chart, but it does change which patrols are active, which in turn changes the safe check on nearby waystones.
Is the in-game map the same on every platform?
The mapping tool itself is identical across PC and console versions, but controller navigation on console is slower than mouse navigation on PC. Players who switch between platforms should expect to use personal pins more often on console, since the cost of opening the sheet mid-ride is higher.
Leave a Reply